Best Practices for using UserLock
UserLock uniquely empowers IT to leverage the active directory logon as a critical security checkpoint. As you’re getting started with the software, take a look at these best practice tips to ensure you get the most out of UserLock.
- 1. Apply MFA policies for the most privileged users
- 2. Require MFA for all users connecting remotely from outside your network
- 3. Require MFA for logons without network connection
- 4. Restrict users to initial access points, with the control to remotely logoff previously opened sessions
- 5. Enable workstation restrictions for device management
- 6. Schedule a working hours report to monitor user activity
- 7. Use Geolocation Restrictions to block any access from non-authorized countries
- 8. Set up alerts for all logins denied by UserLock
- 9. Set Agent distribution settings for an optimal deployment
- 10. Enable Remote Assistance for easy troubleshooting
-
Apply MFA policies for the most privileged users
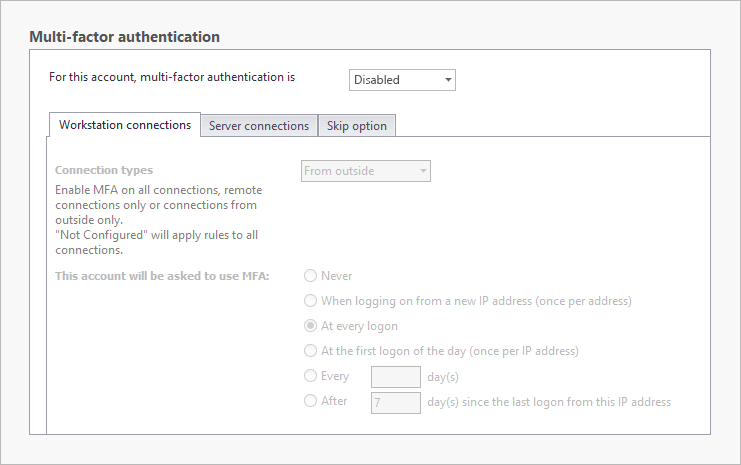
There is no one size fits all policy for privileged users, so your settings will depend on your environment and how your users connect. However, as a best practice, these high privileged users should require MFA at every login.
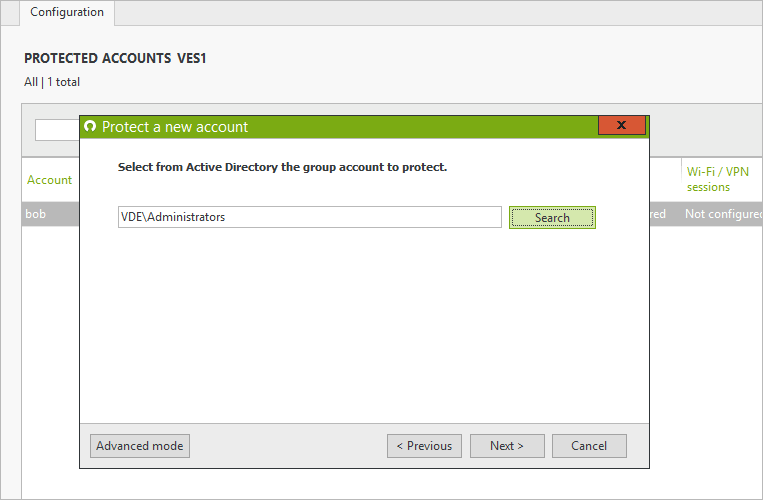
Create a protected account for the Group, OU or individual user that you consider to be “privileged”.
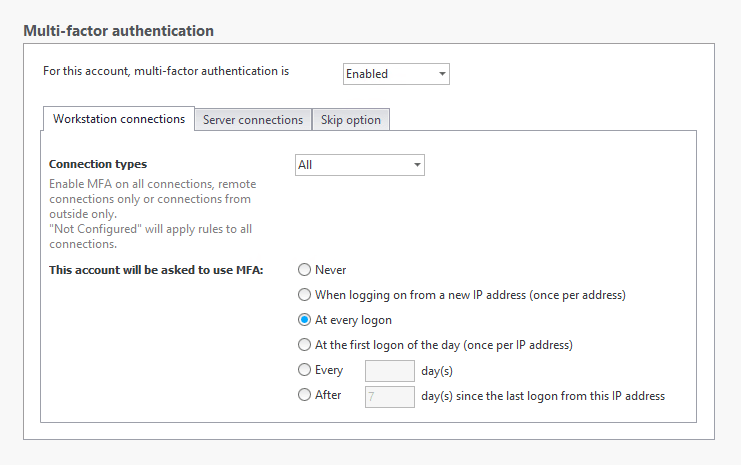
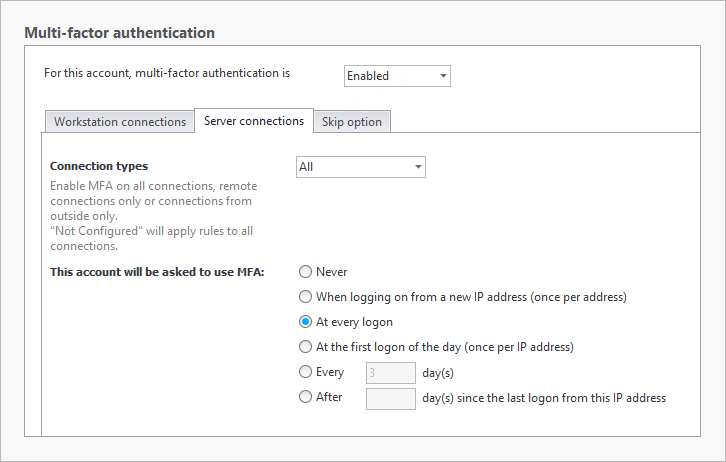
An administrator’s tasks might require that they have several types of sessions open throughout the day including their local desktop session and RDP sessions for internal IT tasks on workstations and servers. Enable MFA on all types of connections for these users for every login.
NB: To avoid locking out all admins if someone makes a mistake in a protected account, the following is recommended. Create a user account that always has full access to a machine where the UserLock console is installed. This account can then make changes to the console and unblock users when necessary.
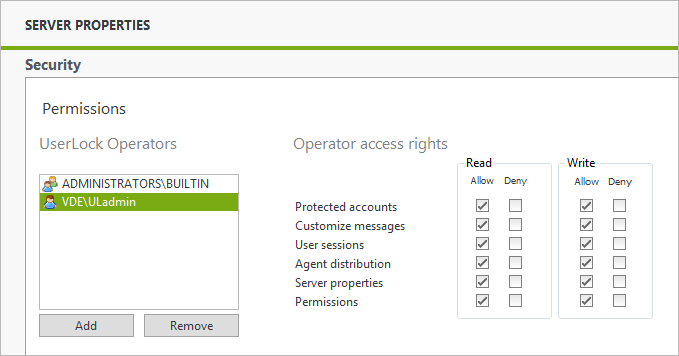
Make sure the user is added to the security section of UserLock:
Create a protected account for this user that will override any other protected account:


-
Require MFA for all users connecting remotely from outside your network
Attacks to your network can often come from a user connecting to the network with legitimate, but stolen credentials. MFA can significantly reduce your attack surface and stop hackers trying to penetrate the network.
Create a protected account for “everyone”.

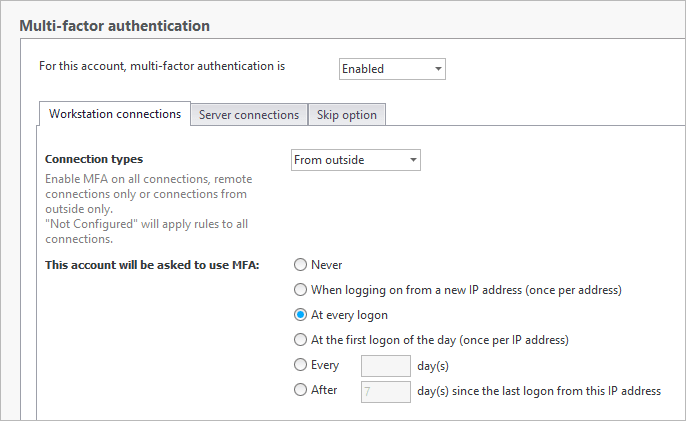
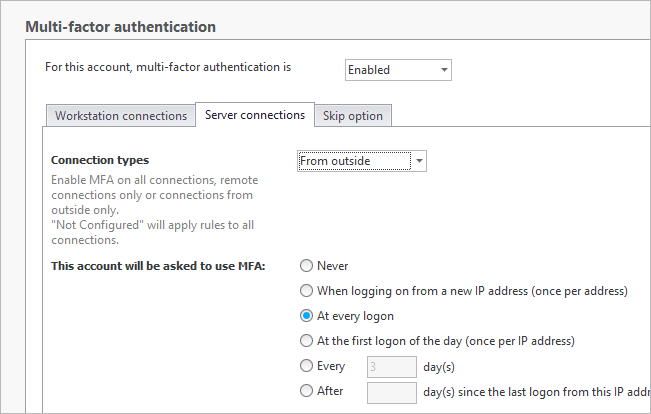
Enable Workstation and Server connections for “From outside” and “All logons” or “first logon of the day” depending on how your users connect throughout the day, and how strict you’d like to be.
-
Require MFA for logons without network connection
Today’s working environment is as mobile as its users. Whether users are working from home, or traveling, they still have access to company data, and the risk of material getting misplaced or stolen is higher. What happens when a sales rep leaves a laptop on the train with sensitive company and client data? Use the MFA for connections outside of the corporate network to secure your most vulnerable devices.
Go to Server Properties => Connections from machines without network connection.
Select “Ask for MFA”.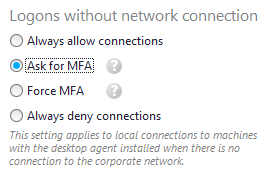
Once this feature is enabled, the user must already be enrolled in MFA and have connected once to that machine while connected to the corporate network. After that, all logons without network connection will be prompted with MFA. For more information about this setting, see this use case.
-
Restrict users to initial access points, with the control to remotely logoff previously opened sessions
Balancing security and user productivity is a constant battle for IT admins. You need to limit access to your network without impeding users. You can do this in UserLock by limiting the points of entry into the network, but also allowing users the option to remotely logoff existing sessions, if they exceed their limit, without having to contact the Help Desk.
The setting is part of the protected account, so it can be enforced for a specific user, group or OU.
Define a number of initial access points allowed.

And enable users to logoff existing sessions remotely to stay within their limit:

-
Enable workstation restrictions for device management
Educating users is an important step in any security policy. But users need to be protected from themselves as much as outside attackers. For example:
- Karen from finance has no good reason to connect to a machine in the sales department.
- Remote workers should only connect via VPN from a known device.
- Admins should not use their Domain Admin accounts to troubleshoot users’ workstations.
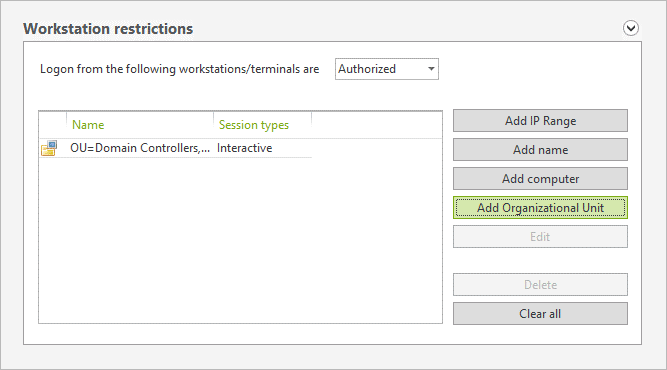
Use workstation restrictions to enforce company security policy while reducing your attack surface.
- Limit users to specific machines or Computer OU’s.
- Allow VPN or RDP connections from trusted devices.
- Limit by IP address.
For example create a protected account for your Domain admins:
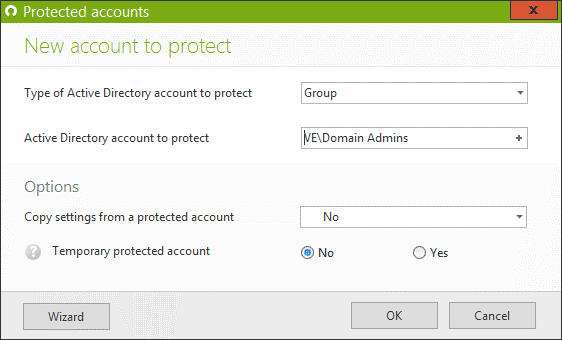
Authorize these accounts to only access domain controllers or machines that are heavily safeguarded (behind your fortress!)
-
Schedule a working hours report to monitor user activity
Whether you need to fulfill a manager’s request for user’s working hours or just to keep an eye on when users connect to the network, the Working Hours reports gives you an easy way to check each users’ first connection and last logoff of the day. Schedule the report by AD group to be sent to each respective manager to allow them visibility of their teams’ daily login and logoff times.
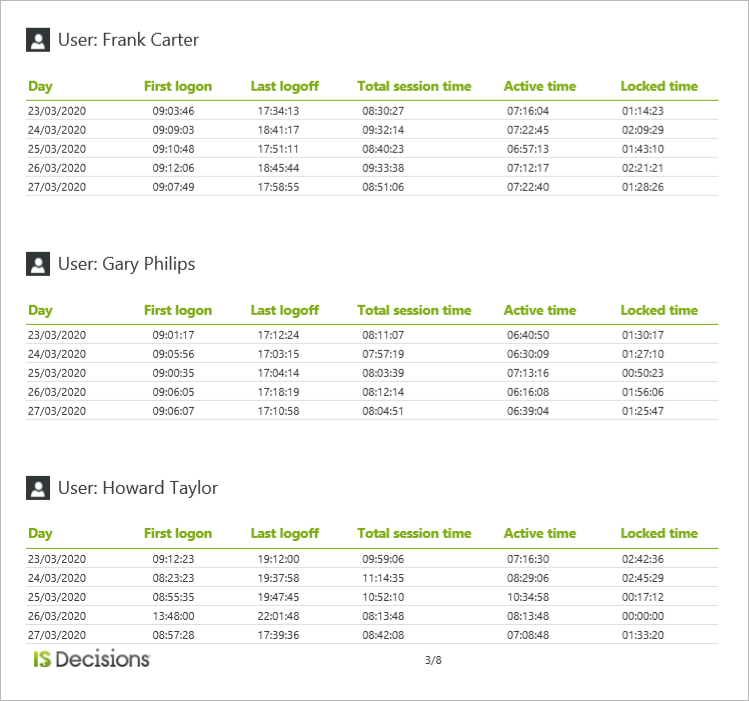
You can choose from 4 predefined reports:
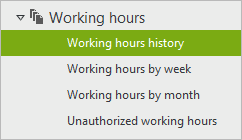
Filter by AD Group:

Schedule the report in the Quick Access Panel:
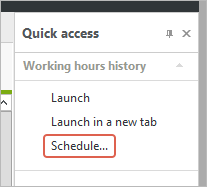
And email to department manager:
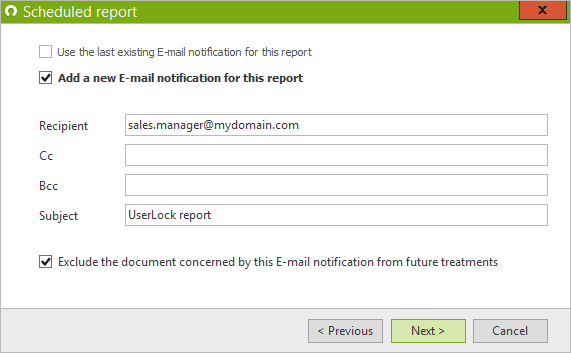
For more info on scheduling reports, go here.
-
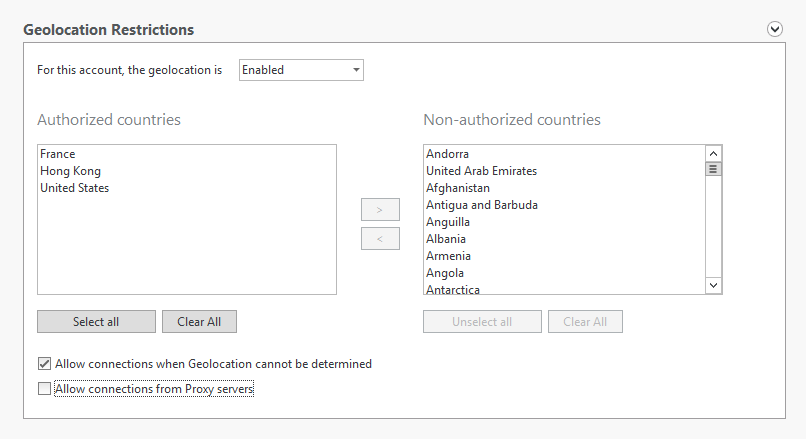
Use Geolocation Restrictions to block any access from non-authorized countries
The simplest way to reduce your global attack surface is to reduce your access around the globe. In protected accounts for OU’s, groups or users, allow users to login from authorized countries only. You can even choose to refuse connections from proxy servers and when the Geolocation cannot be determined.
-
Set up alerts for all logins denied by UserLock
Now that you’ve put in place your access policies to require MFA or restrict unwanted access, wouldn’t you like to know when someone tries to connect outside of their allowed policies?
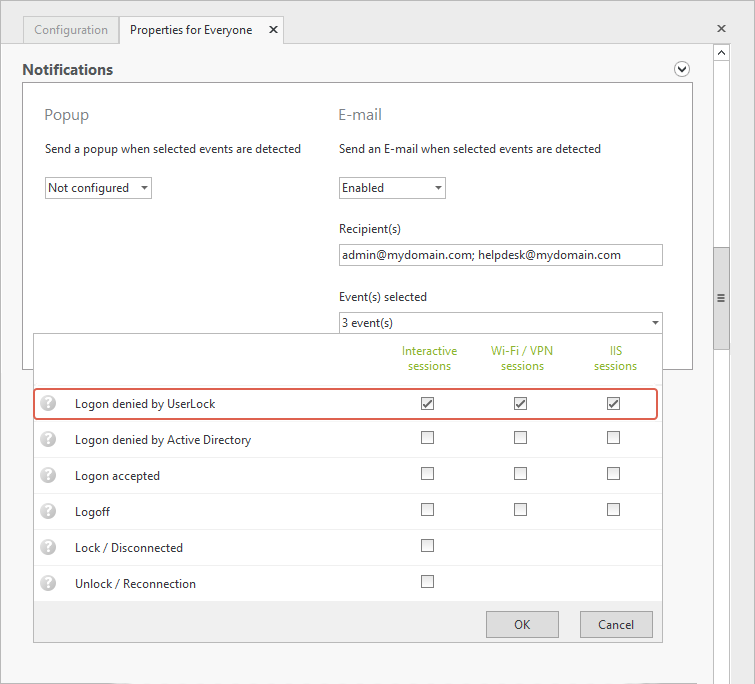
Set up email or popup notifications for all users whose connections are refused due to a UserLock restriction.You can do this for each protected account, or just create one for the group “Everyone” to make it easier.
In the protected account, under “Notifications”, enable email notifications for “Logons denied by UserLock” for the three session types:
-
Set Agent distribution settings for an optimal deployment
UserLock needs to deploy agents to machines that you wish to protect. To optimize onboarding new machines, enable the following settings:
Enable the “Automatic Mode” in agent distribution to automatically deploy agents when new machines are added to the network.

To ensure that agents can be installed successfully, the Remote Registry service needs to be enabled on end points. Allow Userlock to enable this service when trying to deploy agents. To do this, right click on Agent distribution and select “Properties”.
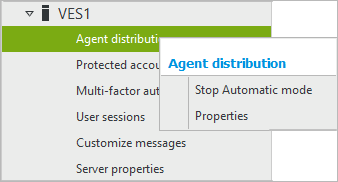
Check the box to authorize this setting:

-
Enable Remote Assistance for easy troubleshooting
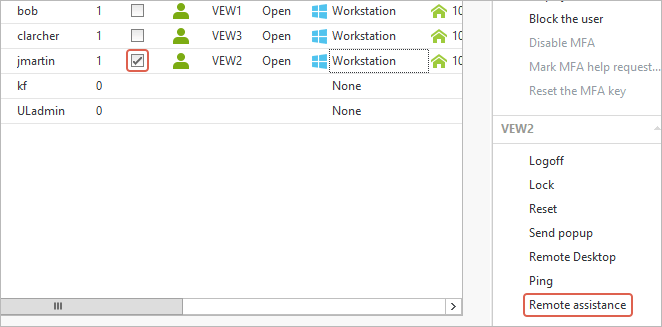
With UserLock you can see where users are connected in real time. For help desk tickets where the admin needs to troubleshoot the machine in question, you can use the Remote Assistance shortcut in the console to connect to users open sessions (it is available in the "Quick access panel" of User sessions and Agent distribution views).
To be able to use it, the "Remote Assistance" feature must be activated on the computer on which the console is installed (by default, this feature is activated on workstations and deactivated on servers) and "Offer remote Assistance" must be configured in domain policy and allowed in firewalls. FYI this link explains very well the prerequisites for Remote Assistance.
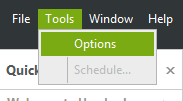
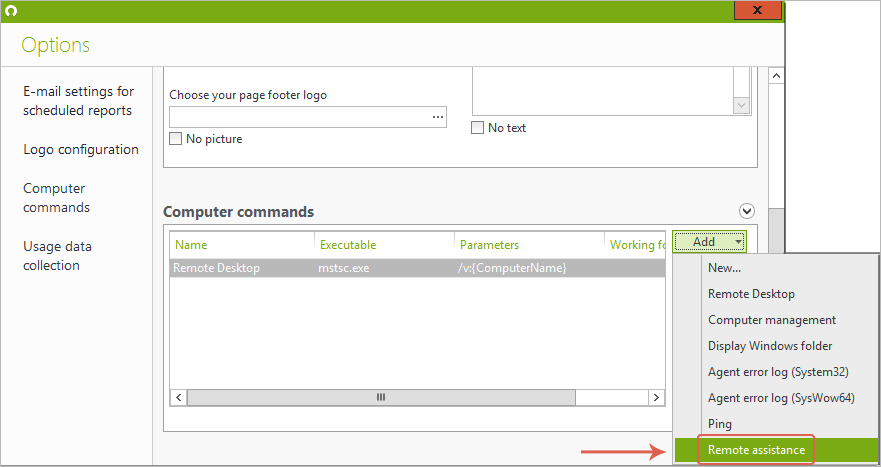
To add the shortcut to the console to Tools => options => Computer commands
Click on “Add” and select “Remote Assistance” from the Drop-down menu:
Back in the UserLock console, select an open session, and see the Remote Assistance from the menu on the right panel, or right click on the open session to select from the dropdown menu:
