Enroll users with an Authenticator Application
Help users activate Multi-Factor Authentication (MFA) on their smartphones using an authenticator app, and guide them through their first MFA login.
This guide explains how to help end users activate and use Multi-Factor Authentication (MFA) on their smartphones with an authenticator app.
It describes the setup process and what users will experience during their first MFA login and subsequent authentications.
Note
🚩 Before following this guide:
We recommend reading How to implement MFA for general recommendations, communication tips, and preparation steps to ensure a smooth rollout.
Before starting enrollment:
Verify that the smartphone’s date and time are correct. It is best to set the phone to update automatically, otherwise, MFA codes may be rejected.
Make sure users know their domain credentials.
Advise users to have their smartphone at hand during their first connection.
Ensure users install a TOTP-based authenticator application on their smartphone.
Note
UserLock works with any TOTP-based authenticator.
Below are some popular options:
Google Authenticator
Microsoft Authenticator
LastPass Authenticator
2FA Authenticator
Duo Mobile
Authy
Before enrolling, make sure that MFA is enabled for the user account in UserLock.
Note
See Access policy management to learn how to apply an access policy in UserLock.
See MFA policy reference for details on MFA policy rules and options.
When a user logs in for the first time after MFA activation, a QR code dialog box will appear.
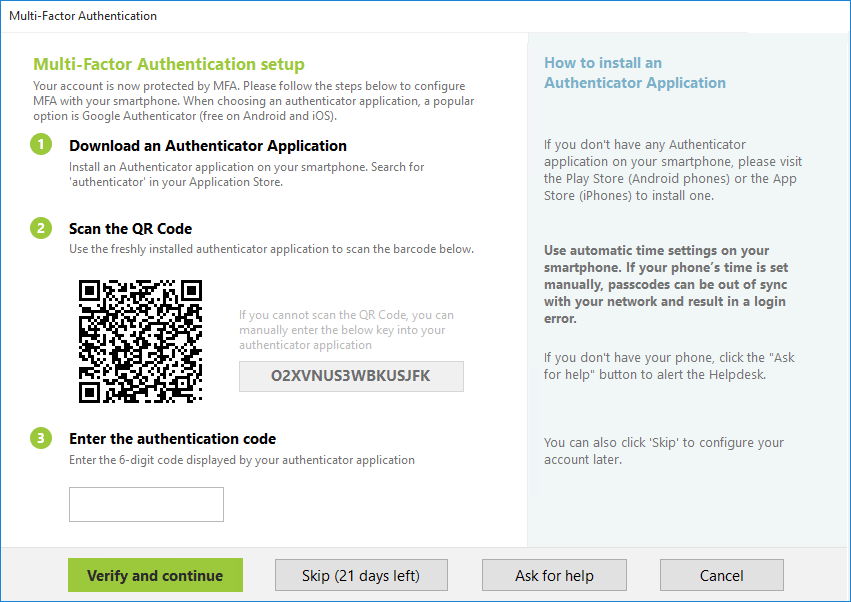
The user must:
Open the Authenticator app on their smartphone.
For example for Google Authenticator app, tap the multi-colored plus sign at the bottom right of the app. Select Scan QR code (or enter setting key).
Scan the QR code displayed on screen.
The app will generate a 6-digit MFA code.
Enter this code into the UserLock dialog box and click Verify and Continue.
Once verified, the MFA setup is complete.
Note
The dialog automatically adapts to the OS language (English, French, or Spanish).
The subtitle text is editable. View ⚙️ Server settings > Messages.
⚠️ If the enrollment window does not appear, verify that the UserLock Desktop Agent is up to date and that MFA is required by the user’s access policy.
After the initial enrollment, MFA becomes a regular part of the user’s login process.
Each time a connection requires MFA, the user will be prompted to verify their identity with a time-based code from their authenticator app.
Typical experience:
User enters credentials.
The MFA prompt appears.
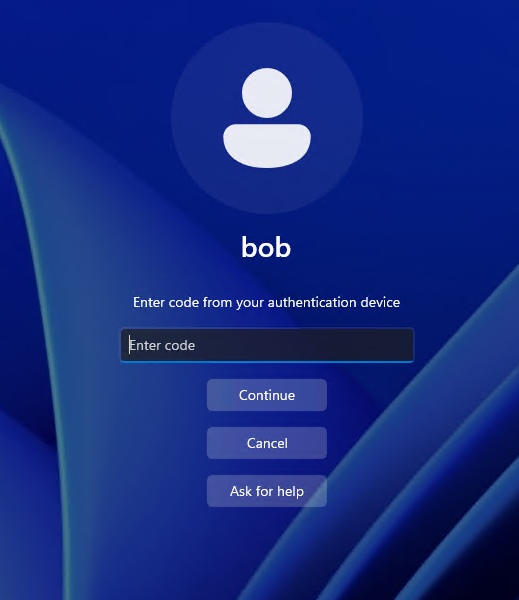
They open the authenticator app, read the code, and type it in UserLock’s dialog box.
Access is granted.
Administrators can adjust the MFA experience to fit their organization’s needs:
Option | Description | Default |
|---|---|---|
Skip (N days left) | Allows users to temporarily bypass MFA enrollment. You can enable it per policy configuration. | Disabled |
Ask for help | Adds a button to request assistance during MFA setup. | Disabled |