UserLock Webhook Notifications – a Step by Step guide
Webhooks make it possible for web applications to subscribe, in real-time, to key access events that occur in UserLock.
Session events such as a logon, logoff, lock, unlock, denied logon etc. are sent as a JSON message to a web application. Custom workflows can then be built in response to specific access events.
Combined with the UserLock API, it also allows permanent or temporary restrictions to be dynamically created for specific user profiles – in response to a specific event.
This article provides a step-by-step guide on how to deploy a web application that is able to receive Userlock notifications in Microsoft Azure.
Prerequisites
To complete this tutorial:
-
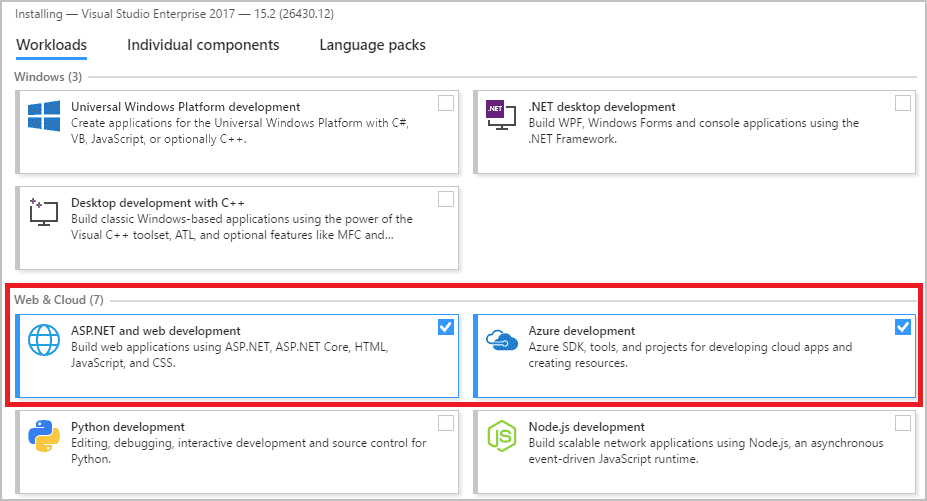
Install Visual Studio 2017 with the following workloads:
- ASP.NET and web development
- Azure development
If you don't have an Azure subscription, create a free account before you begin.
-
Create UserLockWebHook MVC web application
To follow a more detailed step-by-step on this topic, please read Microsoft Azure documentation here.
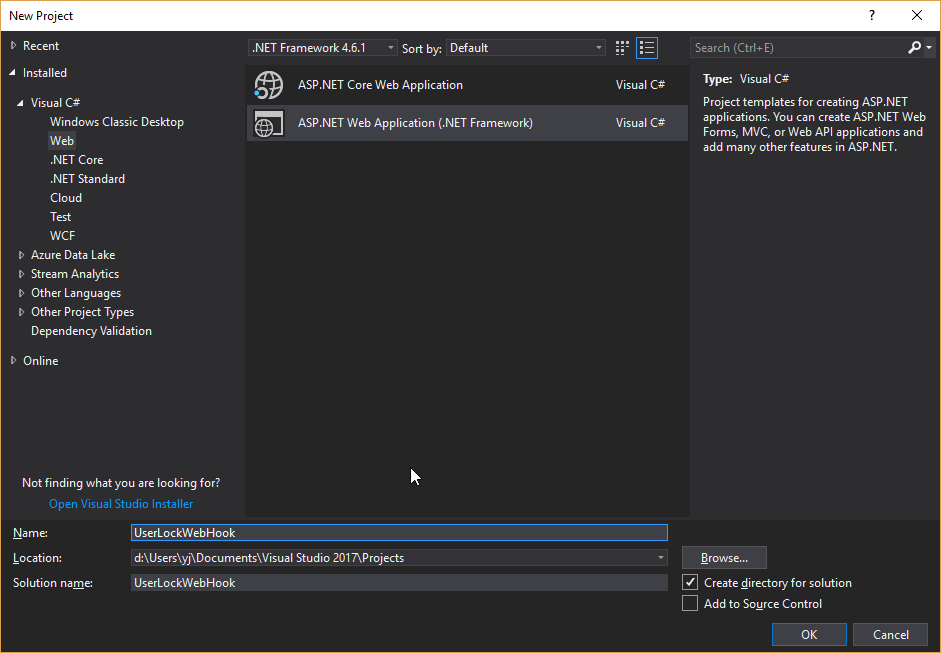
In Visual Studio, create a project by selecting File > New > Project.
In the New Project dialog, select Visual C# > Web > ASP.NET Web Application (.NET Framework).
-
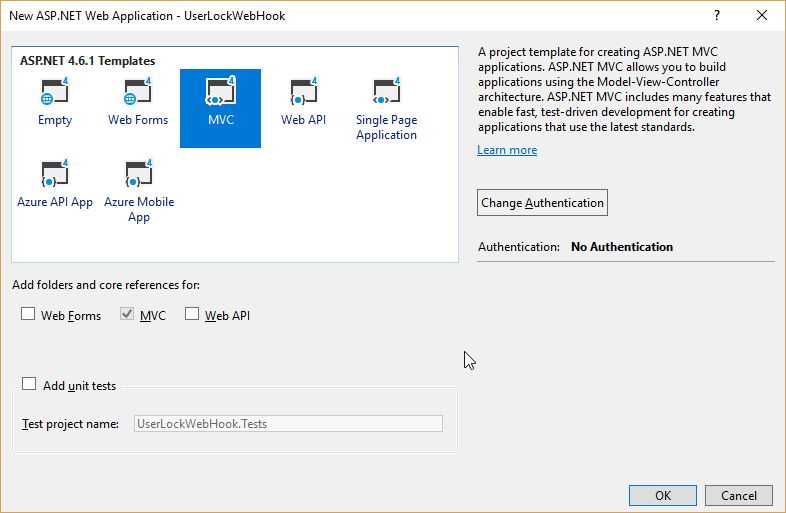
Select MVC template
Select the MVC template and make sure authentication is set to No Authentication.
-
Update all NuGet packages and install NewtonSoft.Json package
Open Tools->NuGet Packet Manager->Manage NuGet packages for the solution.
Open Updates tab, check ‘Select all packages’ checkbox and click Update button.
Open Browse tab, enter Newtonsoft.Json in the search field and install the package. This package will be used to deserialize the notifications sent by UserLock.
-
Create the following classes in Models folder
These classes will also be used during the deserialization process.
					public class UserLockServer
{
public string Id { get; set; }
public string FQDN { get; set; }
public string DisplayName { get; set; }
}

					public class UserlockNotification
{
public UserLockServer Userlock { get; set; }
public int EventType { get; set; }
public DateTime EventTime { get; set; }
public string UserAccount { get; set; }
public string UserDomain { get; set; }
public string UserFullName { get; set; }
public string ComputerName { get; set; }
public int ComputerSession { get; set; }
public string ClientName { get; set; }
public string ClientAddress { get; set; }
public string SessionId { get; set; }
public int SubSessionId { get; set; }
public int LogonInfo { get; set; }
public int SessionType { get; set; }
public string ServerAddress { get; set; }
public int TimeZoneShift { get; set; }
public string Param1 { get; set; }
public string Param2 { get; set; }
public string Param3 { get; set; }
public string Param4 { get; set; }
public string Param5 { get; set; }
public string Param6 { get; set; }
} -
Update Home controller
Replace HomeController class with the following one:
					public class HomeController : Controller
{
private static List<UserlockNotification> _notifications = new List<UserlockNotification>();
private static List<string> _userLockIds = new List<string>();

public ActionResult Index()
{
Response.AddHeader("Refresh", "3");

ReadUserlockIds();

return View(_notifications);
}

private void ReadUserlockIds()
{
string ids = ConfigurationManager.AppSettings["UserlockIds"];
_userLockIds = ids.Split(new char[] { ';' }).ToList();
}

[HttpPost]
public ActionResult Notify()
{
try
{
string data = GetPostData(Request.InputStream);

UserlockNotification ul = JObject.Parse(data).ToObject<UserlockNotification>();

// Is the notification sender valid?
// Uncomment the following lines to add a security check
// between the webhook application and UserLock service
// if (!_userLockIds.Contains(ul.Userlock.Id))
// return new HttpStatusCodeResult(HttpStatusCode.OK);

// Truncate Userlock Id to avoid displaying sensitive information
ul.Userlock.Id = ul.Userlock.Id.Substring(1,8);
_notifications.Add(ul);
}
catch (Exception ex)
{

}

return new HttpStatusCodeResult(HttpStatusCode.OK);
}

private static string GetPostData(Stream inputStream)
{
string data = null;
StreamReader reader = new StreamReader(inputStream);
try
{
reader.BaseStream.Position = 0;
data = reader.ReadToEnd();
}
finally
{
reader.BaseStream.Position = 0;
}

return data;
}

public ActionResult About()
{
return View();
}

public ActionResult Contact()
{
return View();
}
public ActionResult GoToWebsite()
{
return Redirect("https://www.isdecisions.com");
}
}
To fix the missing using statements, right-click on each error and select the appropriate action. These are found in the submenu ‘Quick Actions and Refactoring’.
The Refresh header in Index method allows the Home Page to be refreshed automatically so that incoming notifications are displayed by blocks.
The Notify method deserializes the UserLock notification into a UserLockNotification instance.
We chose to add the Notify method in Home controller for convenience. You can of course decide to create a different method in another controller (mycontroller/mymethod)
-
Security Check
Controlling the UserLock ID ensures you avoid receiving notifications from invalid sources. Thus, it’s possible to define a list of GUIDs in the web.config to declare a white list of UserLock IDs and ensure that all received notifications are from a trusted source.
<appSettings>
<add key="webpages:Version" value="3.0.0.0" />
<add key="webpages:Enabled" value="false" />
<add key="ClientValidationEnabled" value="true" />
<add key="UnobtrusiveJavaScriptEnabled" value="true" />
<add key="UserlockIds" value="{your_userlock_guid1};{your_userlock_guid2};" />
</appSettings>
Note: if you have deployed a UserLock backup server, don’t forget to add the UserLock backup server ID to this list.
Then you can uncomment the lines in Notify method. This way, only notifications sent by declared UserLock servers will be handled.
// Is the notification sender valid?
// Uncomment the following lines to add a security check
// between the webhook application and UserLock service
if (!_userLockIds.Contains(ul.Userlock.Id))
return new HttpStatusCodeResult(HttpStatusCode.OK);
How to secure your webhook notifications
Receiving notifications from non-authorized sources can be a problem if a malicious user has decided to dupe your application. To solve that issue, JSON notifications sent by the UserLock service contain a field ‘UserLock ID’ which ensures that all received notifications are from a trusted source.
At this point, please understand that if a ‘UserLock ID’ filter is applied, all notifications sent by a non-authorized server will be dismissed. The field ‘UserLock ID’ is the secret between your application and UserLock. If a member of your organization shares this secret, thus compromising it, you’ll be able to change it (see section Resetting the ‘UserLock ID’ value). However, each time the field ’UserLock ID’ is reset, the white-list of Userlock IDs in webhook applications able to receive JSON notifications must be updated, as the new UserLock ID will once again be an unknown.
Note: if you have deployed a UserLock backup server besides the primary one, please don’t forget to add its own ‘UserLock ID’ to this white-list.
Getting the ‘UserLock ID’ value
Toretrieve the field ‘UserLock ID’, please open a Powershell console on the server where UserLock is running and enter the following command:
Get-UserLockServerConfiguration -Property 'ServerGuid'Resetting the ’UserLock ID’ value
To reset the field ‘UserLock ID’, please open a Powershell console on the server where UserLock is running and enter the following command:
(Get-UserLockServerConfiguration).ResetGUID()Important! You should only do this operation in rare occurrences. For example when the Userlock ID has been compromised as this would permit untrusted sources to send JSON notifications to your webhook application. Resetting the ‘UserLock ID’ field means all client webhook application(s) need to be updated so that the new secret is accepted (as explained previously).
-
Update Home Index.cshtml view
Replace Index.cshtml view with the following one (replace the namespace in red with your own one):
@model IEnumerable<UserLockWebHook.Models.UserlockNotification>

@{
ViewBag.Title = "Home Page";
}

@if (Model != null)
{
<table width="700">
<tr>
<td width="15%">
<b>Event Type</b>
</td>
<td width="35%">
<b>Event Time   </b>
</td>
<td width="25%">
<b>User   </b>
</td>
<td width="25%">
<b>Computer   </b>
</td>
</tr>
@foreach (UserLockWebHook.Models.UserlockNotification item in Model)
{
<tr>
<td>
@Html.DisplayFor(modelItem => item.EventType)
</td>
<td>
@Html.DisplayFor(modelItem => item.EventTime)
</td>
<td>
@Html.DisplayFor(modelItem => item.UserFullName)
</td>
<td>
@Html.DisplayFor(modelItem => item.ComputerName)
</td>
</tr>
}
</table>
}
					else
{
@Html.Label("No notifications")
} -
Build the application
The application should compile correctly at this step.
-
Publish in Azure
Right-click the solution node and select ‘Publish’.
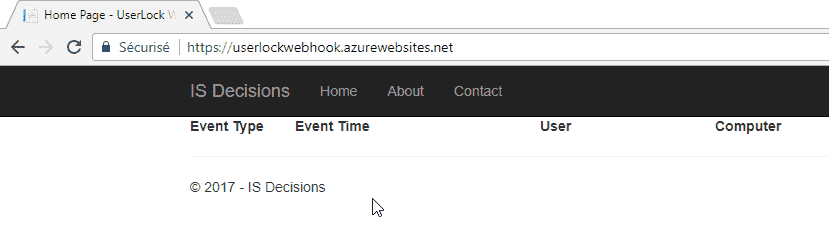
Select ‘Microsoft Azure App Service’ and click Publish button. Fill the fields using your own Azure subscription and Publish.
To follow a more detailed step-by-step on this topic, please read Microsoft Azure documentation here.
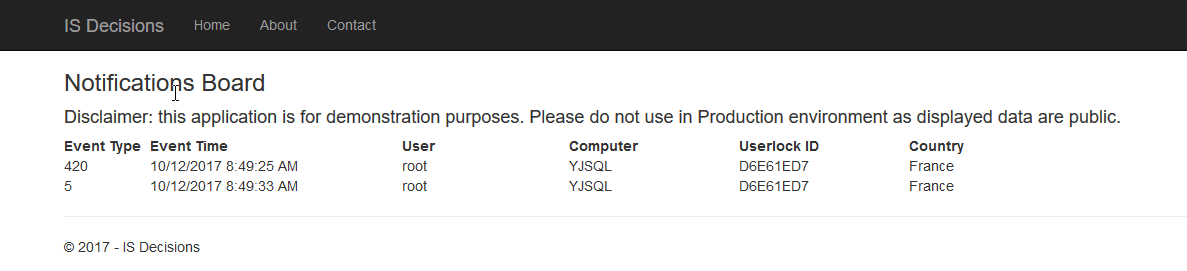
Your browser should now display the following website:
-
Add Webhook notifications to UserLock
Open the UserLock console, right-click on your server and select Properties.
Scroll down to Webhook notifications section:

Enter the url of your web application, appending ‘/Home/Notify’ (or ‘/mycontroller/mymethod’ if you chose an alternative controller/method).
-
Test the web application is correctly deployed to receive UserLock notifications
Generate session events in your network:
Lock an existing session and wait a short time for the notification to appear in the web application.
How to use and customize the webhook
A list of all fields recorded can be found here.
After reading this documentation, you will be able to know what data is of most interest for you, and for which session events you would want to write code in your webhook (E.g. a call to UserLock API methods).
Find out more about UserLock’s comprehensive logon auditing and access restrictions.