UserLock Anywhere
UserLock Anywhere allows UserLock agents to securely contact the UserLock service over the Internet when no direct LAN or VPN connection is available. It ensures that MFA and access policies continue to protect users working remotely.
UserLock Anywhere maintains full UserLock protection for users who are disconnected from the corporate network or VPN.
When a remote user logs on, the Desktop Agent uses a secure Internet connection to reach the UserLock service.
This enables UserLock to apply access policies and ensures consistent protection for remote users.
UserLock Anywhere operates in two modes, depending on your infrastructure and hosting preferences.
Solution | Description | Requirements | Ideal for |
|---|---|---|---|
Cloud | Agents connect directly to the UserLock service through the IS Decisions Cloud API. | UserLock v13+, first agent contact via LAN or VPN. | Simple environments without IIS servers. |
On-premise | Agents connect through an IIS server exposed to the Internet. | IIS roles, DNS setup, custom installation. | Environments needing full control and on-prem hosting. |
The Cloud mode provides a lightweight and maintenance-free solution.
Agents connect directly to the IS Decisions Cloud API to communicate with the UserLock service.
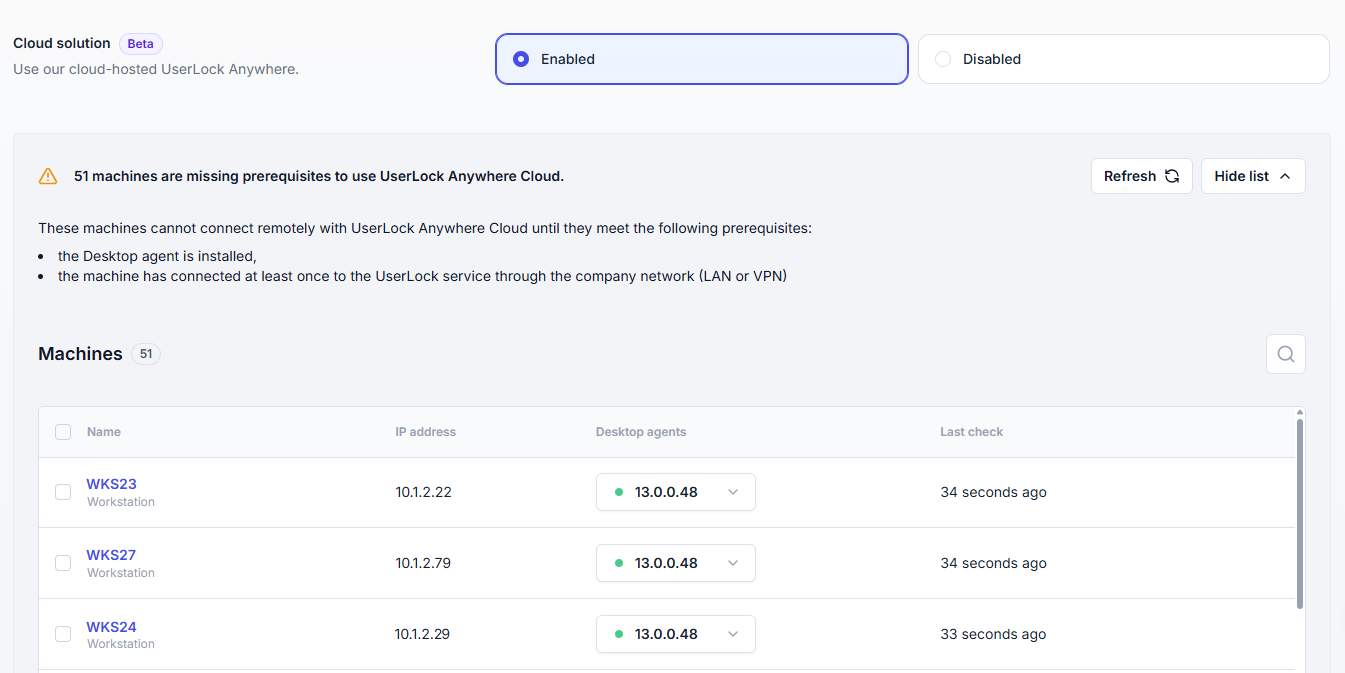
For UserLock to authenticate remote sessions through the Cloud API, each machine must:
have the UserLock Desktop Agent installed,
have already communicated with the UserLock service at least once over LAN or VPN.
⚠️ If these conditions are not met, the machine cannot authenticate remotely.
UserLock automatically:
Detects and lists all affected machines.
Displays a global alert in the administration console, with a direct link to the list for quick follow-up.
Administrators can then use this list to verify agent connectivity and ensure that all machines are properly registered before users start working remotely.
Note
⚠️ The Cloud solution is a new feature (v13+) that continues to evolve based on customer feedback.
It is fully supported, but we recommend monitoring your environment and keeping UserLock up to date to benefit from ongoing improvements.
In on-premise mode, communication between the Desktop Agent and the UserLock service is routed through an IIS web application that is hosted on a server connected to the Internet.
This approach offers maximum control over data routing and security policies, while maintaining identical behavior to the Cloud version.
A Windows Server with the IIS role installed.
Properly configured DNS and HTTPS access
Note
👉 For detailed installation steps, see:
Installing and configuring UserLock Anywhere on IIS
👉 To strengthen the authentication mechanism used between remote agents and the UserLock service, you can replace NTLM authentication with certificate-based authentication.
Configure the client certificate authentication in UserLock Anywhere
UserLock Anywhere provides several operational and security benefits:
Continuous MFA protection – even when users are disconnected from the VPN.
Consistent policy enforcement – identical access controls across on-site and remote sessions.
Improved reliability – user authentication remains functional when VPN access is unstable or unavailable.
Automatic detection and alerts – administrators are notified of non–Cloud-ready machines.
Flexible deployment options – choose between a managed Cloud API or a fully controlled on-premise setup.
Seamless user experience – no configuration required for end users once enabled.
Enhanced authentication security – possibility to use client certificates instead of NTLM for remote agents.