Installing Userlock VPN Connect
Learn how to install and configure the UserLock VPN Connect client on Windows computers. This guide explains each step to deploy the MSI file, configure settings via Group Policy or manually, and verify the setup.
UserLock VPN Connect is a lightweight client utility that improves VPN logon experience and MFA reliability for Windows users.
For more details, read the UserLock VPN Connect reference.
Before deploying UserLockVPN Connect, ensure the following:
A Windows VPN connection is already configured.
The UserLock Desktop Agent is installed on protected computers.
If you plan to apply MFA to VPN connections, then you must also install:
UserLock Anywhere to allow communication between remote computers and the UserLock service.
UserLock IIS MFA to handle MFA prompts and enrollment.
💡️ These components are only required if you enable MFA for VPN logons.
On the UserLock server, locate the installer file:
C:\Program Files (x86)\ISDecisions\UserLock\UserLock.VPN.Connect.msiDeploy the
.msifile to end-user computers:Manually, by running the installer on each computer, or
Automatically, using standard software deployment tools or Group Policy software installation.
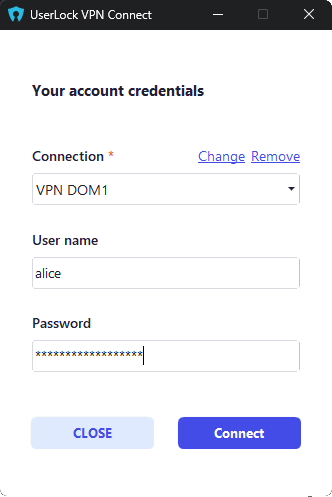
After installation, the UserLock VPN Connect application becomes available from the Windows Start menu.
Configuration can be managed either centrally via Group Policy or locally by the user (if permitted).
You can predefine all VPN Connect settings using the Administrative Template provided with UserLock.
Locate the Group Policy template file:
C:\Program Files (x86)\ISDecisions\UserLock\VpnConnect.admOpen the Group Policy Management Console (GPMC).
Add the template to the GPO applied to your target computers.
In the Group Policy Editor, navigate to:
Administrative Templates → UserLock → VPN Connect
(Use “Classic Administrative Templates” on Windows Server 2008 and later.)
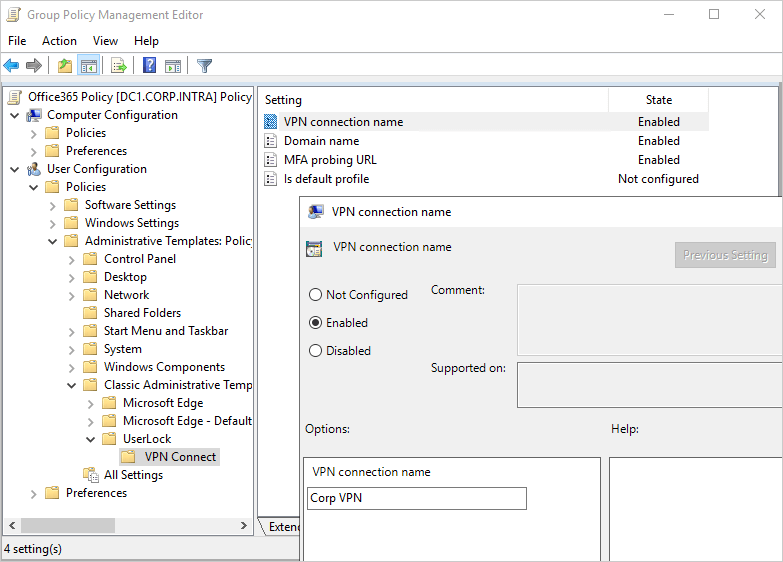
Once configured, these settings will be automatically applied to all users in the selected OU or GPO scope.
If you do not use Group Policy, administrators or users can configure VPN Connect directly through the application interface.
When opening UserLock VPN Connect for the first time, the configuration page allows entering:
The VPN connection name
The domain name
The MFA probing URL: based on the URL of UserLock Anywhere, using the "Probing" subfolder. Example: http://Server1.MyDomain.intra/ulproxy/Probing
Please ask your admin to provide this link.
These settings can be modified later as needed.
After configuration, verify that:
✅️ The VPN Connect application opens without errors.
✅️ The configured VPN connection appears correctly in the list.
✅️ The UserLock service can reach the workstation through the VPN session.