Configure Google Workspace for UserLock Single Sign On (SSO)
Procedure
Configure Google Workspace for Single Sign On (SSO)
- Log into https://admin.google.com/ac/home and log into your domain’s admin console.
-
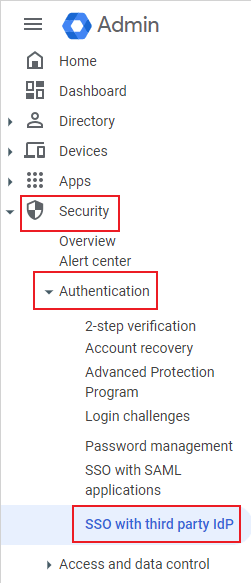
Navigate to "security → Authentication → SSO with third party IdP":
There are two ways to set up SSO in Google Workspace: Apply SSO to the whole organization (global application), or to a specific Google Workspace OU or Group.
How to setup up for a global application:
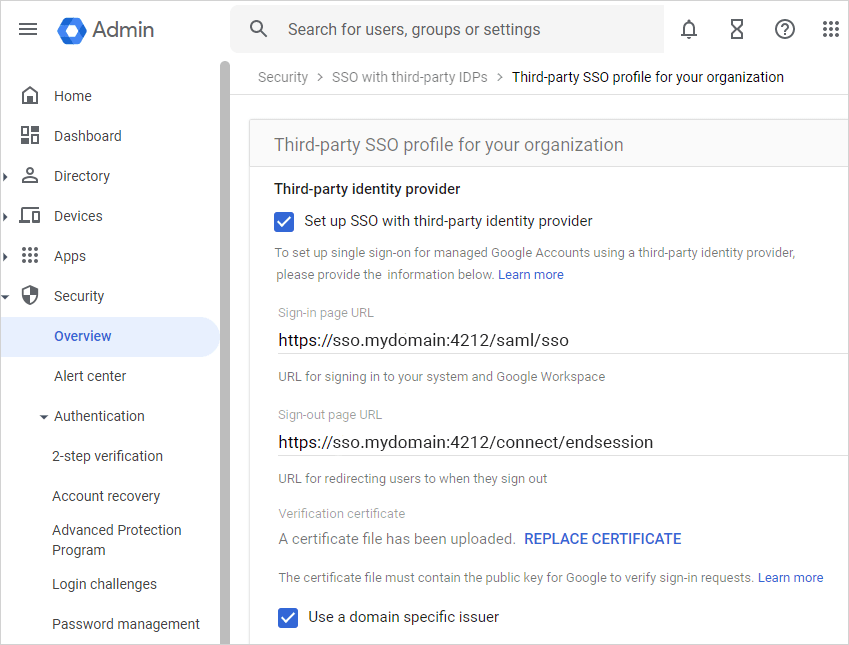
In the "Third-party SSO for your organization" section, make sure the following values are selected:
- Check the box “Set up single sign-on (SSO) with a third party Identity Provider”
- Sign-In Page URL, set the value: https://sso.<yourdomain>.com/saml/sso
- Sign-Out page URL, set the value: https://sso.<yourdomain>.com/connect/endsession
- For the Certificate Verification navigate to the %ProgramFiles(x86)%\ISDecisions\UserLock\SSO folder and locate and download the ulsso.signing.cer certificate.
- Tip: check "Use a domain specific issuer
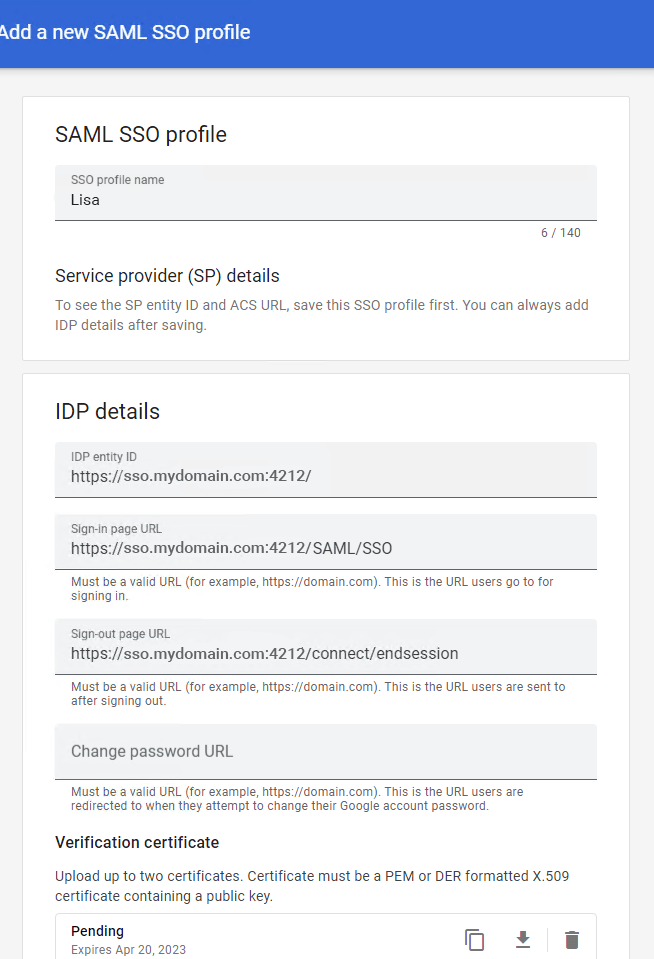
How to create apply SSO by OU/Group in Google Workspace.
In the "Third-party profiles" section, you need to create a profile for each exception you need. To do this click on "ADD SAML PROFILE".
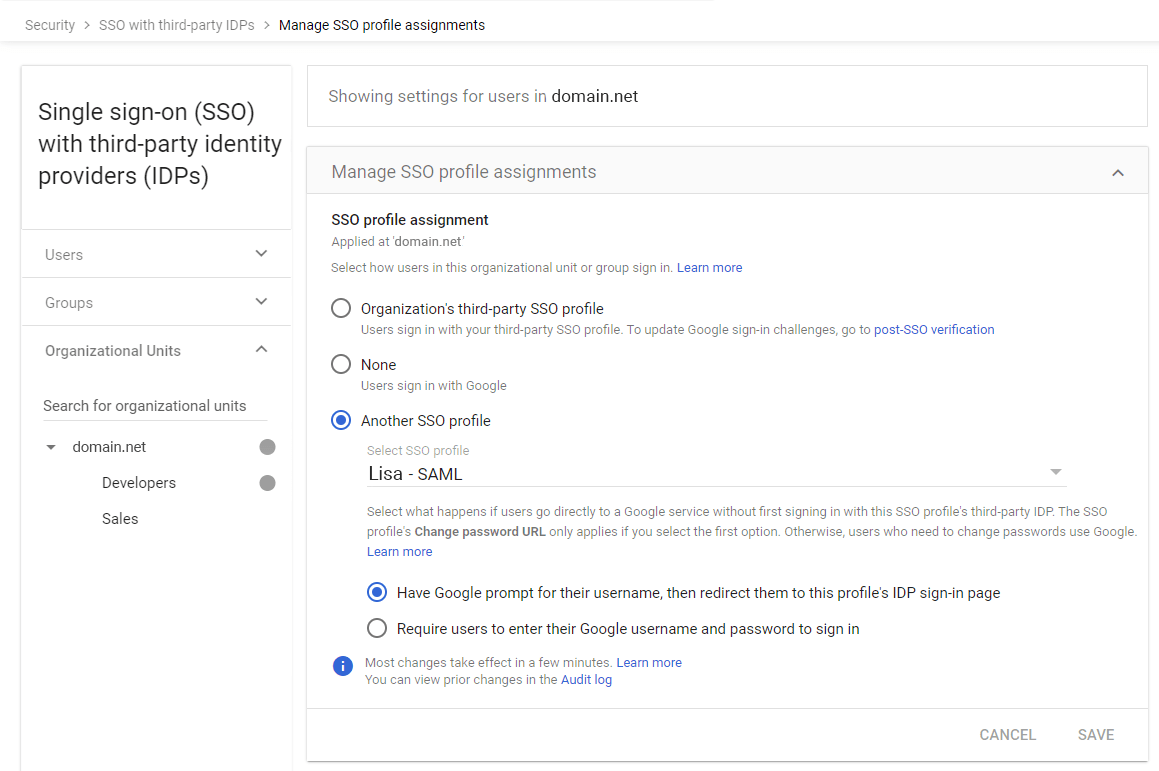
- Configure SSO profile assignment
Once the configuration is done, you have to choose which profiles will be affected. To do this, select the configuration you wish to apply in "Manage SSO profile assignments”
- In the case of a global application, choose "Organization's third-party SSO profile"
- In the case of configuring for a specific profile, choose "Another SSO profile"
- To deactivate SSO, choose "None"
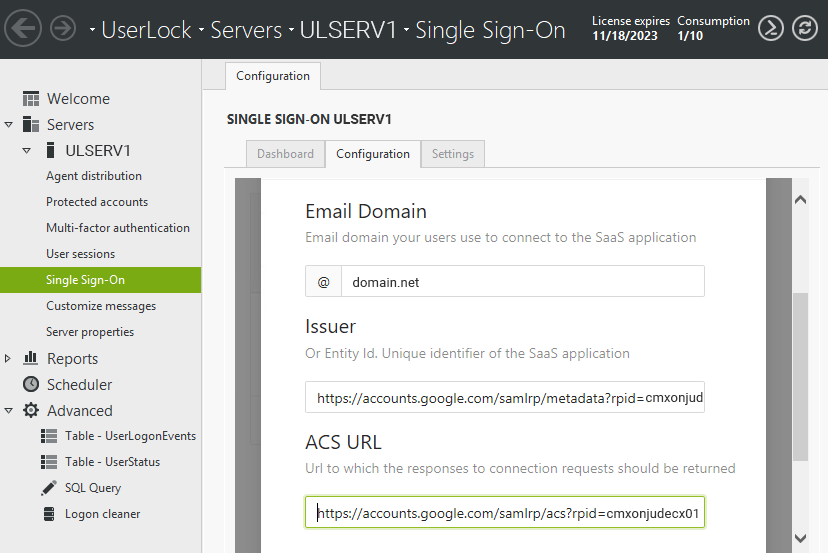
Activate Google Workspace in UserLock SSO
When applying to the entire organization:
In the UserLock console, navigate to Single Sign-On (SSO) → Configuration.
- Select Add Configuration, then select Google as the provider to configure.
- Email Domain: enter the email domain you want to use to allow users to log in.
- Sender: enter the domain of your Google Workspace instance (for example: google.com/a/sso.mydomain)
- ACS URL: (for example: https://google.com/a/sso.mydomain/acs)

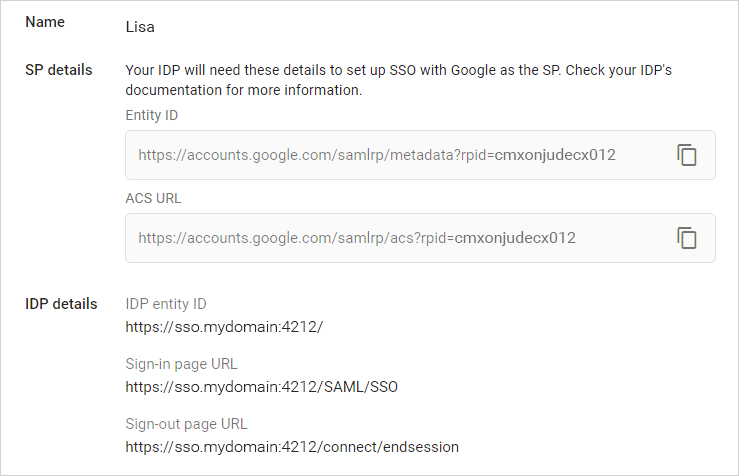
When applying to a specific OU or Group in Google Workspace:
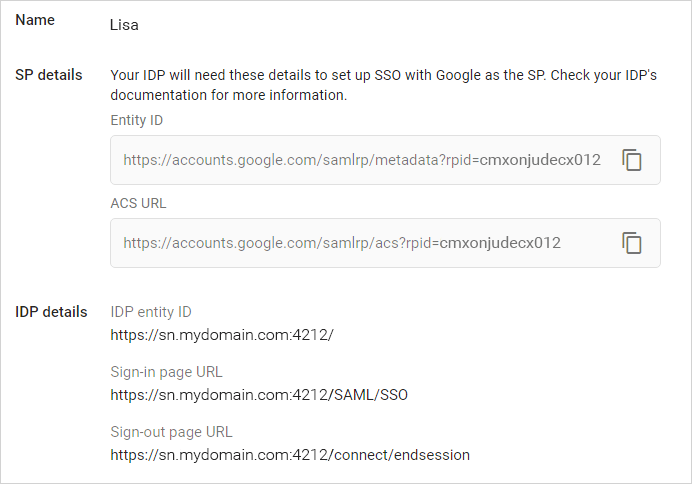
Copy and paste Entity ID and ACS URL of the desired profile (in the "SP details" section of the Third-party SSO profile in Google Workspace) into UserLock.
NOTE: The SSO service must be restarted to use this profile.
How to cancel SSO
Single sign-on can be disabled in emergency situations as long as super-administrators enter the full email address of their Google admin account and the associated Google password.