Scheduler
The UserLock console has an integrated 'Scheduler'. The following tasks can be scheduled:
- Generate reports and send them by E-mail.
- Clean old logon events from the UserLock database.
Schedule reports
Reports can be scheduled to generate automatically, with the results saved in a file in the desired format or sent by E-mail to the chosen recipients.
-
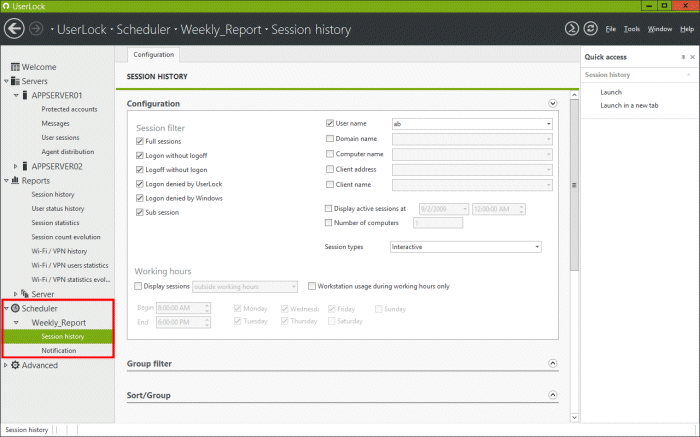
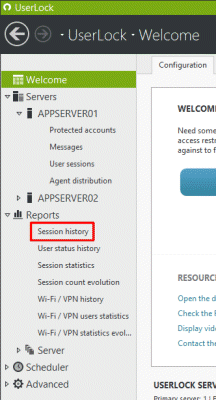
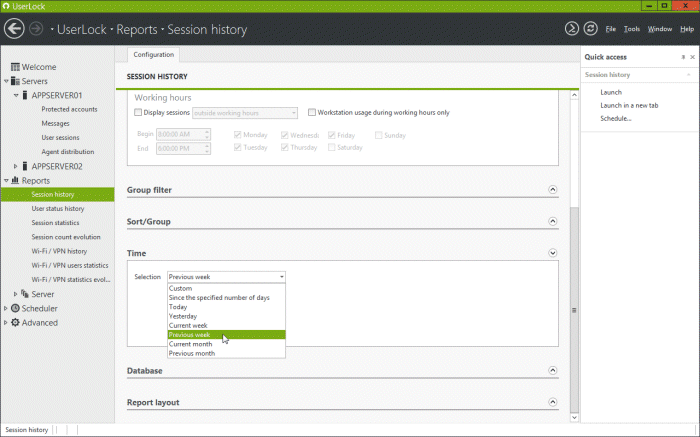
In the UserLock Windows console, expand the 'Reports' node in the menu tree and click on the desired report, for example 'Session history', to display its settings form.
-
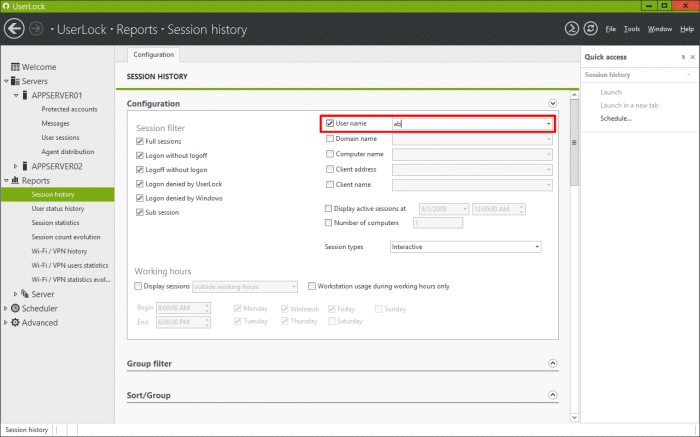
Adjust the different 'Session filters' and criteria as desired.
-
Scroll down the form to display the 'Time' section. Select the desired time period for which you want to display the user connection hours. Note that the chosen time period will be relative to the execution date. For example, here, we have chosen the 'Previous week' to always obtain a report displaying the connection hours of the previous week.
-
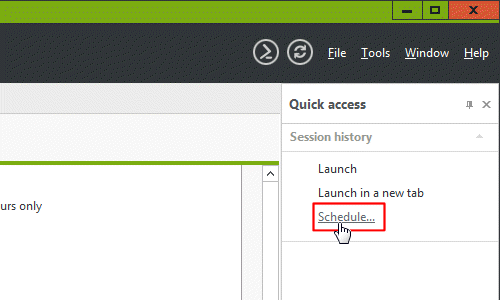
Once the report is set as desired, click on 'Schedule' in the 'Quick access' panel.
-
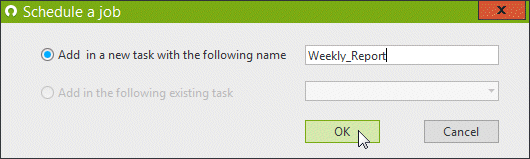
A window will open to define a name for the scheduled task. Type the desired name and click on 'OK'.
-
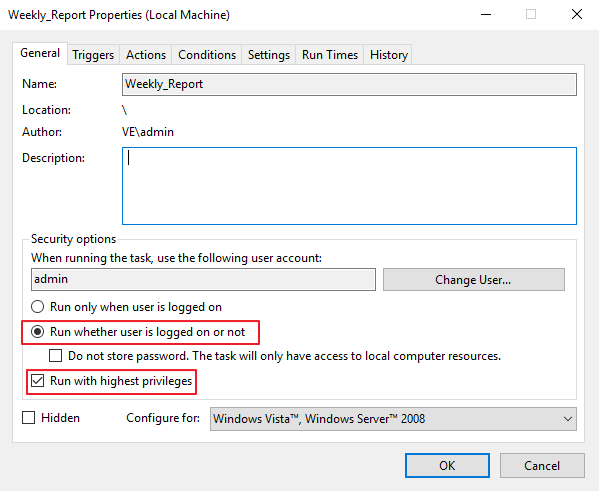
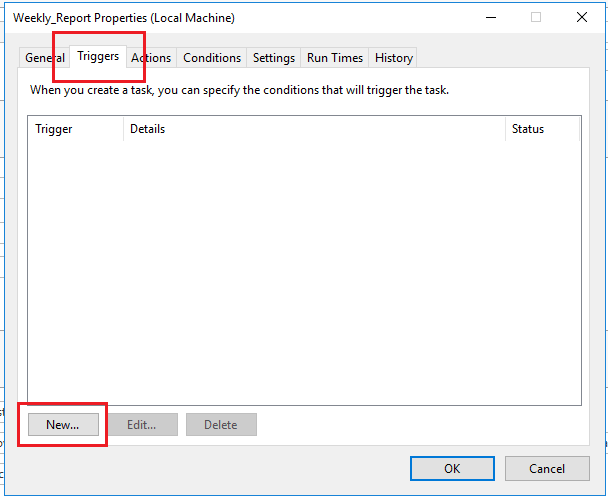
The Windows scheduler will open
Click on the Triggers tab, and select “New”.
-
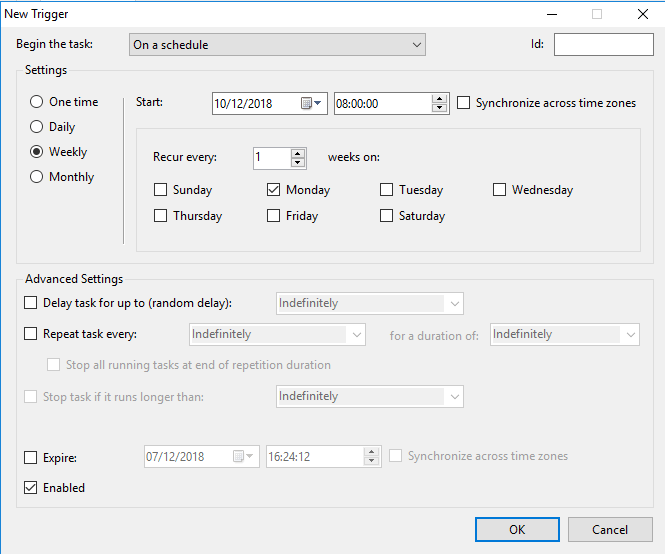
Define the desired scheduled time settings and click 'OK'.
In our example, we want to schedule a report displaying the connection hours for the previous week:
- Schedule Task: Weekly
- Start time: 8:00 AM
- Schedule Task Weekly: Every 1 week(s) on Mon.
This will allow you to obtain a report every Monday morning the report about the previous week's connection hours.
-
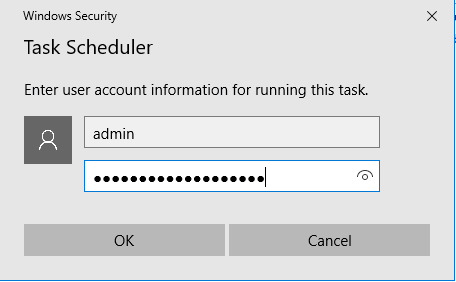
A prompt window will open to enter a user's credentials for this task. The account set here will launch the task and save the report. Note that this account requires permission to run a task on the machine and to write a file in the folder you will define later as the save location of this report.
-
A quick wizard will open to finish the scheduled report configuration. The first step allows you to define the save location.
You can change the default path by browsing to the desired folder or share. Click 'Next >'.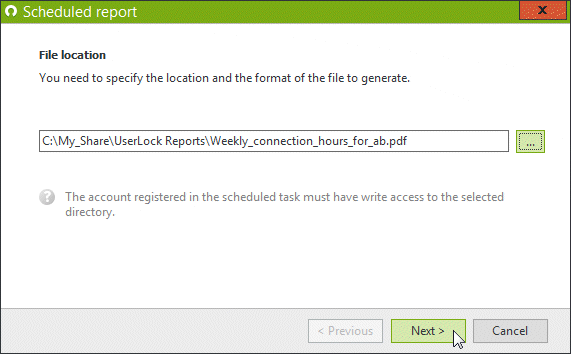
Note that the account defined during the previous step needs the required permission to write into the selected folder.
-
The next step allows you to define recipients to automatically send the report to by E-mail.
Fill in the recipients with valid E-mail addresses and customize the subject as required.
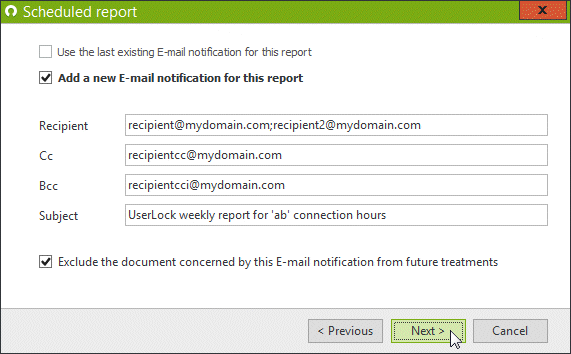
You can uncheck the option to send the report by E-mail if desired. In this case the report will be generated and only saved in the location previously defined.
-
The last step summarize the configuration defined. Click on 'Finish' if every step has been successful.
You can go back if you want to change a setting. Note that you will also be able to modify the task, the report criteria and the notification later if wanted.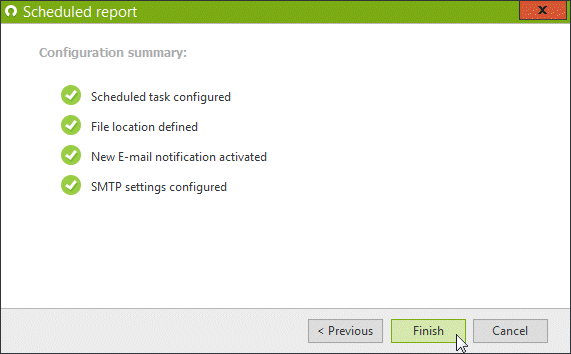
SMTP Settings
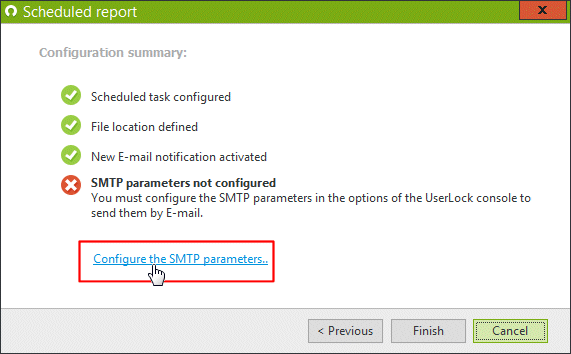
When the SMTP settings have not yet been defined, a warning is displayed.
-
Click on the displayed link below the warning to complete the SMTP settings necessary to automatically send the report by E-mail.
-
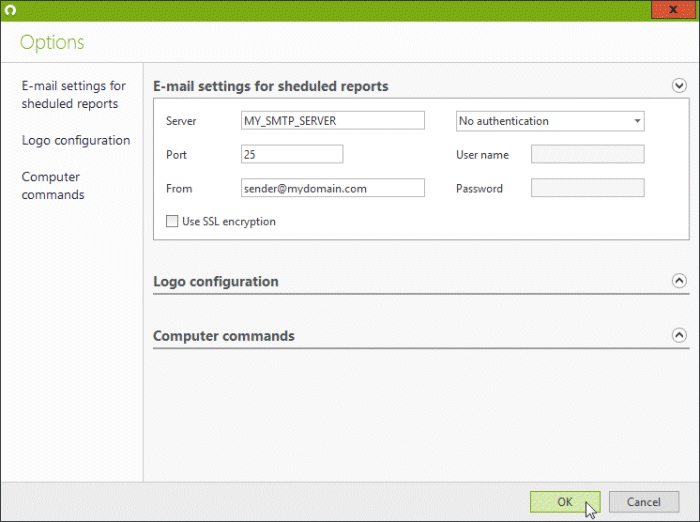
The SMTP settings window will open. Complete the settings with appropriate values, noting that the sender's E-mail address must be valid.
Click on 'OK' to validate and click 'Finish on the scheduled report wizard.
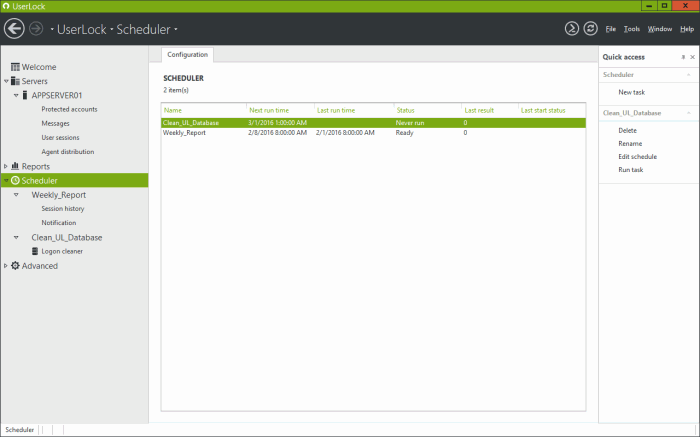
The scheduled report configuration has now been completed, and the report will be displayed in the 'Scheduler' with the chosen configuration.
It will be sent every Monday at 8:00 AM and will show the previous week's connection hours in a PDF format. The PDF file will also be saved in the chosen location.
The 'Scheduler' menu displays each item that has a scheduled task, including the 'Session history' report configuration that we set up during the previous steps, and the 'Notification' configuration listing all recipients. You can edit the report and the recipients from here.