Secure Adobe Sign access with UserLock Single Sign-On
Let users sign documents in Adobe Sign with their corporate identity through UserLock SSO, while enforcing stronger authentication when needed.
This guide explains how to integrate Adobe Sign with UserLock Single Sign-On (SSO) using the SAML 2.0 protocol.
Once configured, UserLock validates Adobe Sign logins against Active Directory. This ensures a seamless login experience and lets you apply UserLock access policies (MFA, time, machine, or location restrictions) to SSO sessions.
🚩️ Before starting:
You need an Adobe Sign account with an approved domain.
UserLock SSO must already be installed and configured.
Open the Adobe Sign console.
In the top menu, click Account.
Expand Account Settings in the left pane and select SAML Settings.
In SAML Mode, select SAML Allowed

🚩️Setting this option to SAML Mandatory will effectively lock out your users until SSO is fully operational.
Choose a host name for future use.
Enter the values using your UserLock SSO URL
(visible in UserLock console▸ ⚙️ Server settings ▸ Single Sign-On ).
Example withhttps://sso.contoso.comSettings
Values
Entity ID / Issuer URL
https://sso.contoso.comLogin URL / SSO Endpoint
https://sso.contoso.com/saml/ssoLogout URL / SLO Endpoint
https://sso.contoso.com/connect/endsessionIdP Certificate
Go to UserLock console▸undefined️ Server Settings▸ Single Sign-On
Click on Download ▸ SAML certificate.
Open it in a text editor, and paste the contents here

Download the Adobe Sign certificate (you will use it in UserLock).
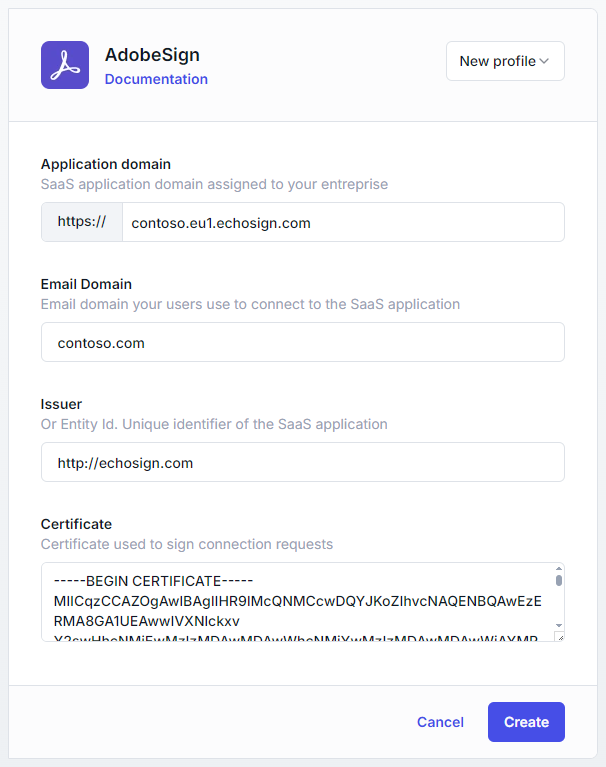
In the UserLock console, go to ⚙️ Server settings▸ Single Sign-On.
In the application list, select Adobe Sign.
Fill in the fields with the information from the Adobe Sign console:
Application domain: available in Adobe Sign ▸ SAML Settings
(e.g.contoso.eu1.echosign.com).
Issuer:
http://echosign.comEmail domain: the domain of the user email addresses used to log in (e.g.
contoso.com).Certificate: paste the Adobe Sign certificate you downloaded in Step 1.
Save the profile.
When you renew the SAML certificate in UserLock (see Renew the SAML certificate), you must also update the configuration in Adobe Sign:
In the UserLock console, go to ⚙️ Server settings ▸ Single Sign-On.
Click Download ▸ SAML certificate and save the file.
Open the certificate in a text editor (Notepad) and copy the full contents.
In the Adobe Sign console, go to Account ▸ Account Settings ▸ SAML Settings.
Paste the new certificate in the IdP Certificate field.
Save the configuration.
Adobe Sign will now trust the renewed UserLock certificate for SSO logins.
For common issues, see Troubleshooting SSO.
If the problem persists, please contact IS Decisions Support.
You can extend the security of SSO sessions by applying UserLock access policies in addition to authentication.
Apply MFA on SaaS connections to require stronger authentication.
Hour restrictions: define when users are allowed to connect.
Geolocation rules: enforce access policies based on user location.
Session limits: allow or deny SaaS logins entirely for specific users.