UserLock Documentation
You are here: Use cases > Multi-Factor Authentication > Implementing Multi-Factor Authentication

Implementing Multi-Factor Authentication

Check pre-requisites and install agents

UserLock protects connections to your network where the UserLock agent is installed. To protect logins with MFA, you will need to install agents based on the connection types to protect:

Plan your deployment and enrollment

As with any organizational change, it’s best to prepare your users by putting in place a plan for MFA deployment and activation.

  • If you are looking to protect several connection types, we recommend that you start with deploying desktop agents and enrolling users for local and RDP sessions before extending to VPN, IIS, and SaaS.
  • Start your deployment with a small set of users who are familiar with MFA and who can eventually assist others. In general, this will be your IT admins.
  • Activate the “Ask for Help” and “Skip” options to allow for easy onboarding.
  • Make sure your users are equipped with devices for MFA before activating policies. Users will need a smartphone if using UserLock Push, a third-party authentication app, or a USB or programmable token. They will need the device at the time of enrollment.

Note: From version 12.2, once MFA is enabled for an account, they will be prompted to enroll on their next workstation login regardless of their MFA settings. This is to help users to enroll asap. The skip option will still be available if it has been enabled. If you prefer that users are prompted to enroll based on the MFA settings configured, you can disable this setting in the advanced settings by pressing F7 in the UserLock desktop console, and changing the setting ForceEnrollMfaOnWorkstation to “False”.

UserLock MFA allows you to authenticate with the following methods:

  • UserLock Push mobile app: For one-tap push notifications and TOTP codes. (UserLock Push notifications are a subscription-only feature.)
  • Third-party authenticator apps: such as Google Authenticator for TOTP codes
  • USB tokens: such as those from YubiKey or Token2
  • Programmable tokens from Token2

For a full list of all compatible tokens, click here.

Configure MFA Settings:

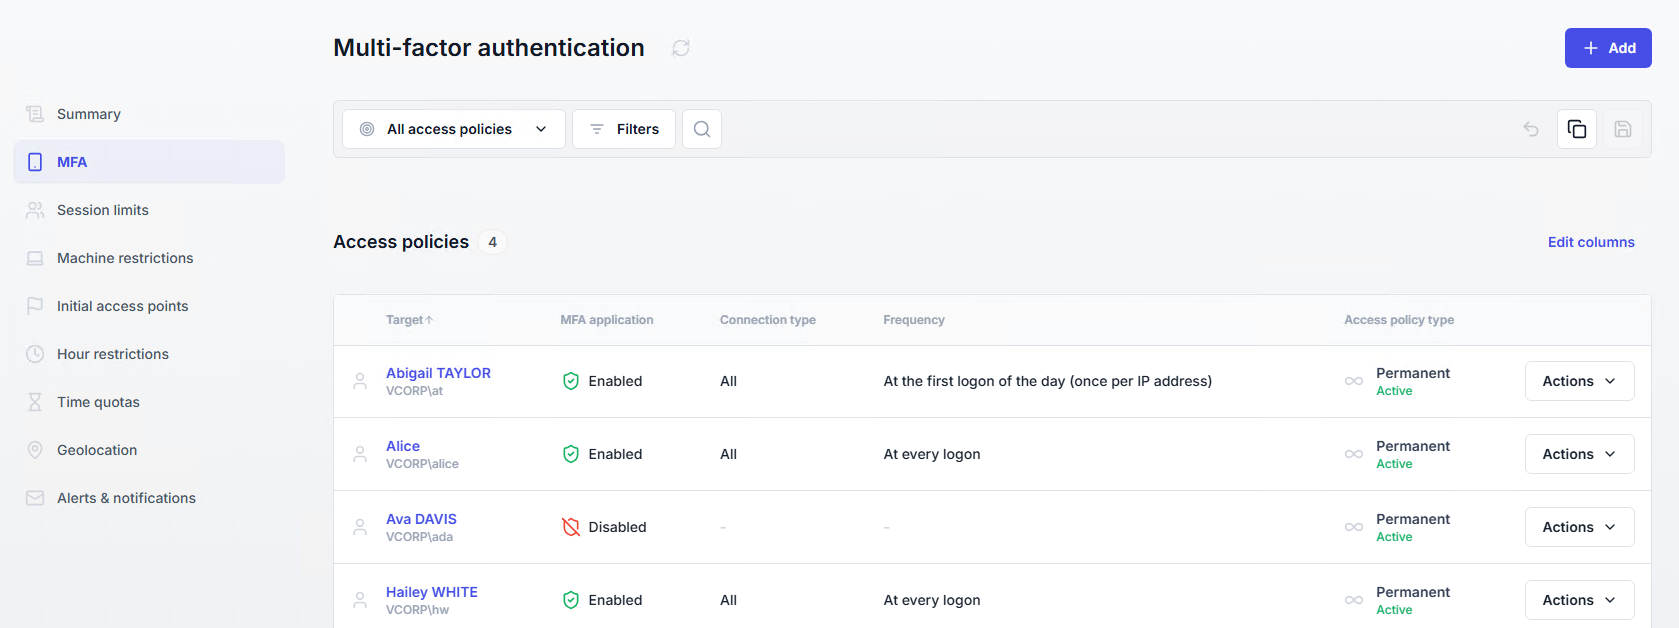
Go to MFA settings in the UserLock console.

MFA settings in the UserLock console

Ask for Help: Activate this feature to allow users to request help and notify admins when they cannot authenticate with MFA. Enter machine names to receive a popup notification, or add one or several recipients for email notifications. For more information, read how this feature works, and how to treat the requests.

Ask for help

MFA Methods: By default, authenticator app and USB tokens are enabled. Push notifications require an internet connection for your UserLock server, and therefore are disabled by default.

Enable the methods that you would like to make available for users. All activated methods will be proposed to users during enrollment. For specific onboarding guides per method, see here.

Alternative MFA methods: Here you can allow or force your users to enroll in two types of MFA methods. Keep in mind that when users enroll in MFA push notifications, they also can access a TOTP code with the UserLock Push app. This TOTP code allows them to connect in case there is a network issue and they cannot receive push notifications.

Alternative MFA methods must be configured at the time of enrollment.

MFA methods

Recovery codes: Recovery codes are one-time use codes that can be used to authenticate if the user does not have access to their smartphone application or token. The user will be presented with these codes at the time of enrollment, and will need to print and store them somewhere safe where they can access them if needed. To generate a new batch of codes, you will need to reset the MFA key for that user, and they will have to re-enroll.
You can choose to provide 4-20 codes per user.

MFA Configuration

Click “Apply” in the Quick Access Panel to save your settings.

Create protected accounts to enable MFA for users, groups or OUs

To enroll users in MFA they must be part of a protected account with MFA enabled. You can create these policies at the OU, Group or user level. For more information on Protected Accounts, click here.

In the Protected Accounts view, double click on a protected account to modify its settings, or create a new protected account. Scroll down to Multi-Factor Authentication. Select “Enable”.

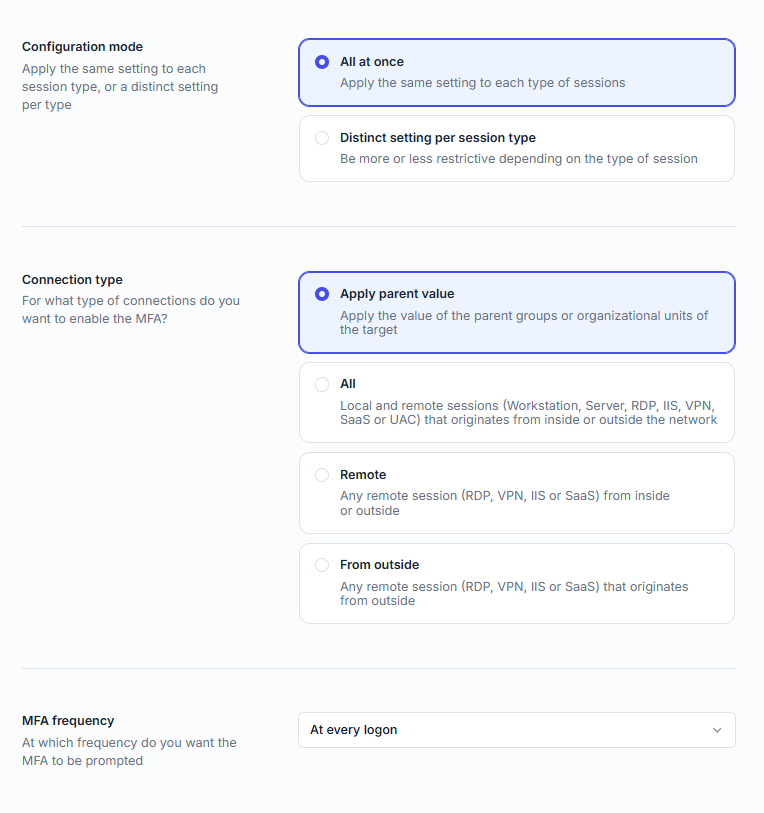
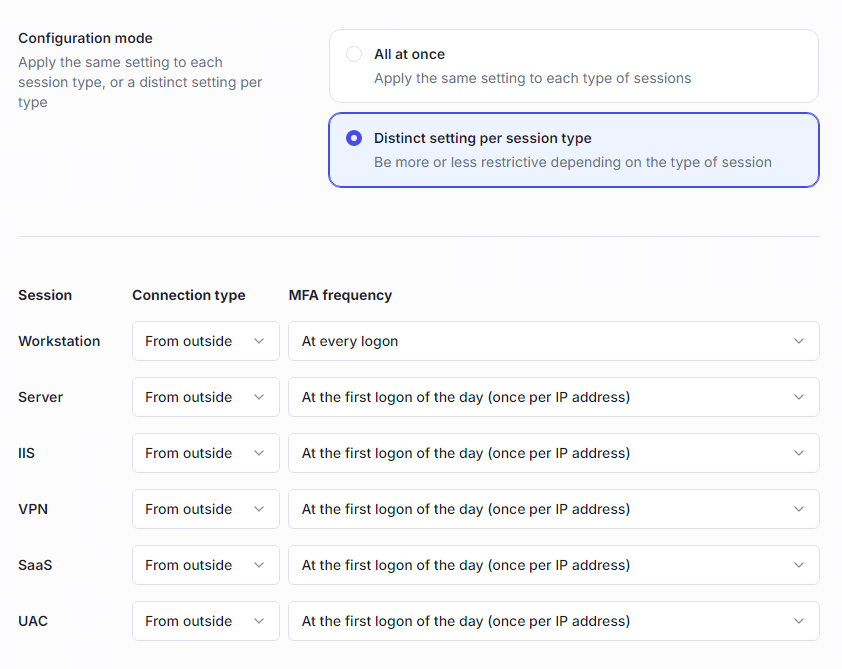
There are two edit modes available for modifying the MFA settings. In either case, make sure you’ve read the documentation for the use case on each type of session to ensure MFA will be prompted.

  • All session types at once: By selecting this option, you can apply the same policy for all session types that are protected by UserLock.
  • By session type: Select this option to apply different MFA policies for each session type.

By session type

Connection types

Select the connection type for each session:

  • All: local and remote connections
  • Remote: Any connection coming from another machine: RDP, VPN, IIS, etc.
  • Outside: Any remote connection where the IP address of the client is coming from outside of the corporate network.
  • Not configured: this option will include all the connection types, or will inherit the rules from a parent policy if one exists (for example, a group policy or OU policy with this user)

Connection type for each session

Frequency

For each session type, you can select the frequency for when the user will be prompted with MFA:

  • At every logon: This includes unlocks and reconnecting to a remote session.
  • At the first logon of the day (once per IP address): Users will be prompted for the first logon of the day (after midnight) and will only be prompted again during the day if they change IP addresses.
  • When logging in from a new IP address: when a user connects for the first time from a new IP address, they will be prompted for MFA. Once this IP address has been registered for UserLock, they will no longer be prompted to authenticate with MFA
  • After a given time: prompt users with MFA at their next logon after a specific time period defined by minutes, hours or days.
  • After a given time since the last logon from each IP address: Same as the above, except the amount of time will be counted from the last connection to that IP address, not the last connection.
  • Never: this account will never be prompted for this type of connection.
  • Not configured MFA will not be prompted unless another policy is applied through another protected account.

Note: Users connecting to remote sessions with the same account from an IP address that has already been authenticated with MFA will not be prompted for these subsequent remote sessions.

Frequency

Skip option:

In this tab, you can activate a button that will allow users to skip the MFA configuration until a specific date. Users will be prompted to enroll based on the frequency that you have configured for MFA. Once this date is past, they will not be able to login until they enroll in MFA.

Note: This option is not supported for IIS MFA and VPN MFA (via VPN Connect).
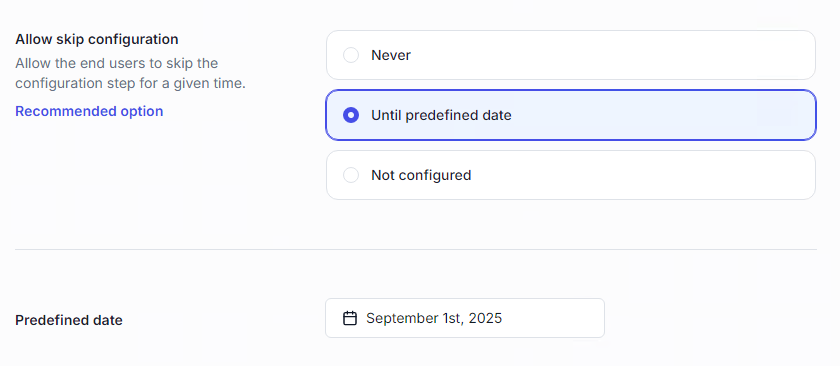
Skip the MFA configuration

Click on Apply in the Quick Access Panel to save your settings.

See specific use cases for enabling MFA for VPN, IIS applications, SaaS applications (SSO), and access onboarding guides for end users for each method.

Limitations

MFA SUCCESSFUL FEATURE

If the MFA code is correctly entered but another UserLock restriction refuses a connection, we cannot see the event that an MFA code has been correctly entered in the UserLock MFA reports (we can only see this only in the logs of the UserLock service).

MFA FEATURE ON BACKUP USERLOCK SERVER

There is no MFA dashboard on Backup UserLock servers.

MFA ON THE WEB USERLOCK CONSOLE

It is not possible to administer UserLock MFA via the UserLock Web App. However, you can manage Help requests and run MFA reports.

Related to MFA: