Migrate the UserLock database
Move UserLock data to SQLite, SQL Server or MySQL from the console, with no events lost while the data is copied.
You change the production database from the console, in Server settings ▸ Database.
The database wizard copies the UserLock data from the current database to SQLite, SQL Server or MySQL, whatever the current provider. For example, you can move from SQLite to SQL Server when a trial goes into production, or from one SQL Server instance to another.
The database stores UserLock events, such as logons and status changes. Access policies, user statuses and server settings are stored by the UserLock service: the migration does not change them.
UserLock keeps recording events in the current database during the copy. When the copy ends, it also copies the events recorded in the meantime, then switches to the new database. No event is lost.
To move a SQL Server database with SQL Server tools instead, see Move the UserLock database files to another SQL Server.
For database requirements, see Database architecture.
Since UserLock 13.1, SQLite replaces Microsoft Access as the default database. An existing Access production database keeps working, but you can no longer select Access for a new production database.
When the production database uses Access, the Database page shows the Recommended: migrate your database to SQLite message. SQLite is file-based, like Access, but has no 2 GB size limit.
SQLite suits trials and small deployments. For production or large volumes of data, migrate to SQL Server instead.
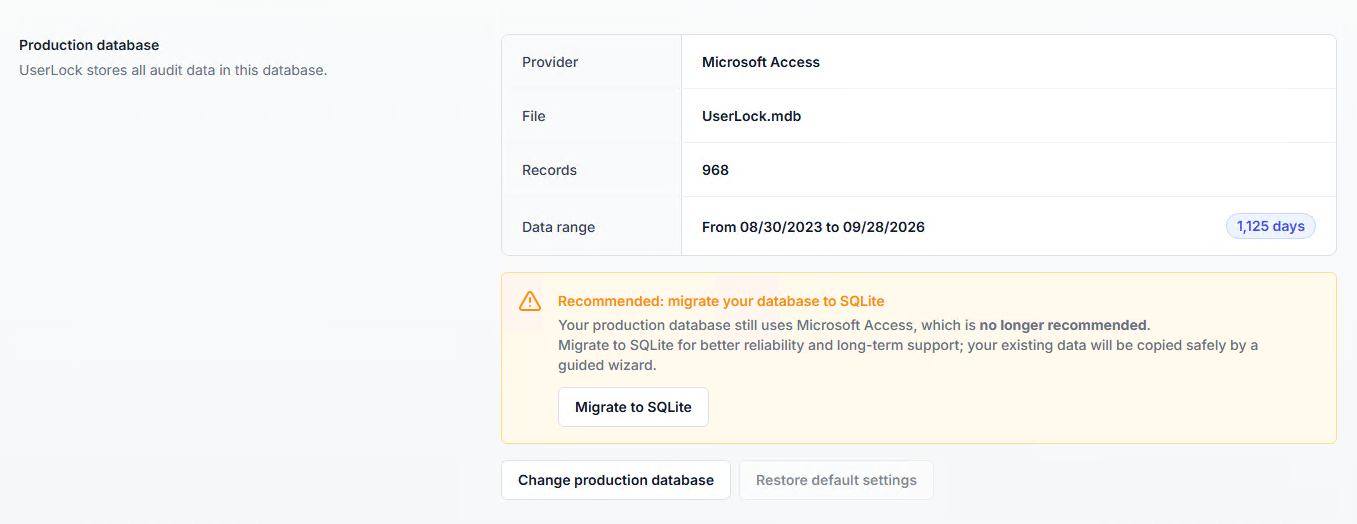
To migrate from Access to SQLite:
In Server settings ▸ Database, under Production database, click Migrate to SQLite. The wizard opens on the Migration step, with SQLite and the default database file already selected:
C:\ProgramData\ISDecisions\UserLock\Database\UserLock.db. To use another location, click Back.Choose what to migrate, then click Continue. See 3. Choose what data to migrate.
Review the summary, then click Confirm and apply. See 4. Confirm and apply the changes.
Then continue at 5. Follow or cancel the migration.
In the console, go to Server settings ▸ Database.
Under Production database, click Change production database. The wizard opens on the Provider step, with the current provider selected.
Select the provider, then click Continue.
SQLite suits trials and small deployments. SQL Server is the recommended choice for production. Select MySQL if your organization already runs it, or Connection string for an advanced setup.
No change is applied before you click Confirm and apply in the last step. Closing the wizard or reloading the page before that discards the settings you entered.
On the Database step, enter the connection details of the selected provider. See the table below.
For SQL Server and MySQL, select an existing database in the Database field, or type a new name. When no database has this name, the field shows New and UserLock creates the database after the confirmation step. To create it, the account used for the connection needs the right to create databases on the server.
Click Continue. UserLock tests the connection.
Provider | Connection details |
|---|---|
SQLite |
|
SQL Server with Windows Authentication |
|
SQL Server with SQL Server Authentication | Enter the Server (hostname or IP), then the Login and Password of a SQL Server account. |
MySQL | Enter the Hostname, Port (3306 by default), Username and Password. |
Connection string | Select the driver in the list, then enter the full connection string. It must include the database name and the authentication parameters. |
If you kept the current provider, the wizard pre-fills its connection details: to move to another SQL Server instance, change only the Server field.
On the Migration step, select an option, then click Continue.
Option | What is copied | When to use it |
|---|---|---|
Don’t migrate data | Nothing. UserLock uses the selected database as it is: empty if it is new, with its existing data otherwise. | You do not need the event history, or the selected database already contains it. |
Migrate all data | All events of the current database | You need the full history for reports and audits. |
Migrate from the last X days | Events of the last X days only. Enter the value in Number of days: the wizard shows the matching start date. | The target has a size limit, such as the 10 GB limit of SQL Server Express, or older events are no longer needed. |
⚠️ Important
If the selected database already exists, Migrate all data and Migrate from the last X days erase its UserLock tables as soon as the migration starts.
Cancelling the migration does not restore them.
To keep the data of an existing database, select Don’t migrate data, or click Back and select a new database.
The migration time depends on the volume of data and on the network between the UserLock server and the database servers. Migrating only the last X days shortens it.
Events that are not copied stay in the current database. You can keep it as an archive and open it in reports as an archived database. See Generate reports from an archived database.
On the Confirmation step, review the provider, the database and the data migration option.
The New database badge next to the database name shows that UserLock will create it. Without this badge, the database already exists: if you migrate data, its UserLock tables are erased. See 3. Choose what data to migrate.
Click Confirm and apply. The wizard closes and the migration starts.
While the migration runs, the Database page shows Migrating data to the new database..., with the current database, the new database and the number of records migrated so far.
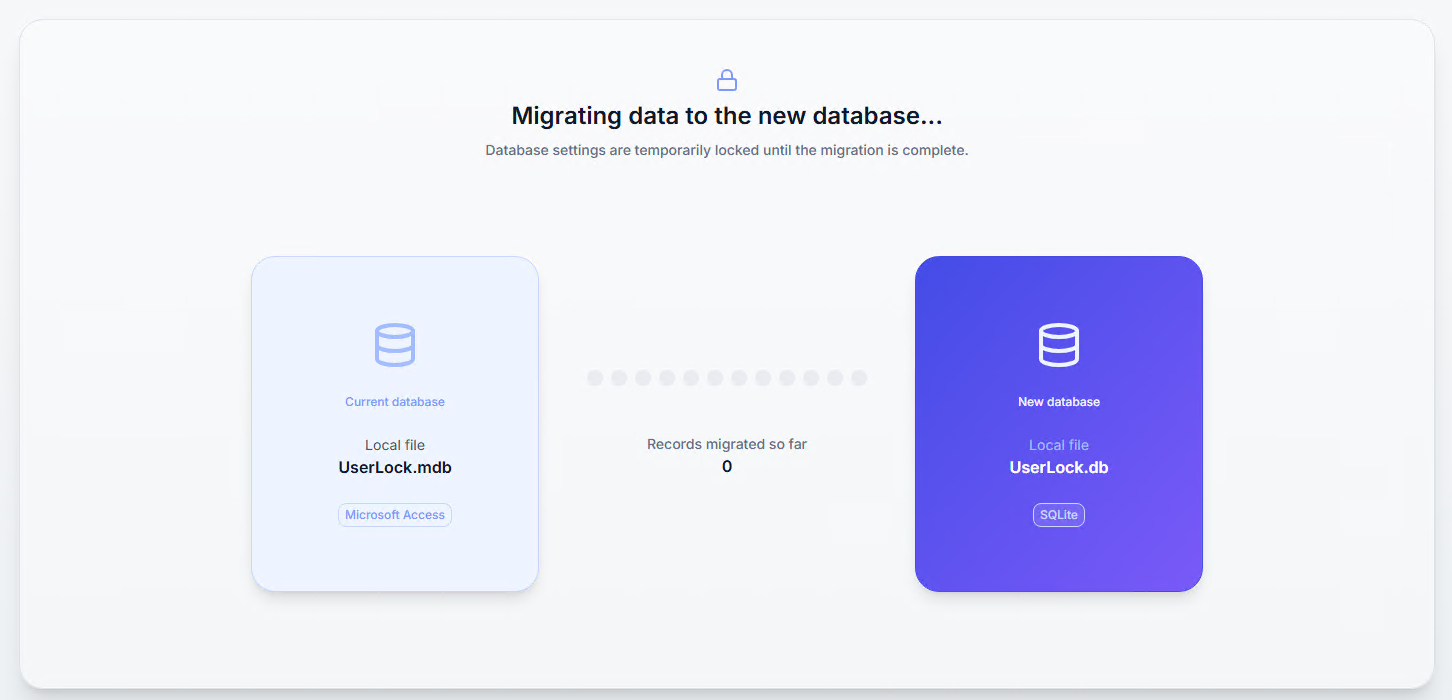
The migration runs on the UserLock server. You can close the console: when you come back, the page still shows the migration in progress.
Database settings are locked for every administrator until the migration ends, then the page unlocks automatically.
To stop the migration, click Cancel migration, below the migration card (scroll down if needed).
The production database stays on the current database.
Cancelling can take some time: UserLock finishes the current copy step before it stops.
The new database is not deleted. It keeps the records copied before the cancellation, so it is incomplete. Delete it manually, or select it again as the target of a new migration.
In Server settings ▸ Database, under Production database, check the Provider, the number of Records and the Data range.
Open a report and check that it shows recent sessions.
If a read-only reporting connection is configured, update it to use the new production database. See Server settings ▸ Database.
Configure permissions and backups on the new database. See Backup settings & data.
Keep the previous database until you have checked the new one, then archive it. UserLock does not modify or delete it.
The UserLock backup database, configured in Server settings ▸ Database, is independent of the production database: the migration does not change it.
Symptom | Fix |
|---|---|
“The database connection could not be established.” after you click Continue | Click Check the details to see the error returned by the database server. |
The error mentions a certificate (SQL Server) | With Windows Authentication, select Trust self-signed server certificates on the Database step. |
The error mentions access rights | Give the account used for the connection the right to create databases for a new database, or to read, write and create tables for an existing one. With Windows Authentication, this account is the Service impersonation account. |
The migration card shows an error | The production database stays on the current database, and the incomplete new database remains in place. Read the error, click Discard changes to return to the Database page, then start the migration again. |
The migration fails because the target database is full | Start again with Migrate from the last X days, or use a target without this size limit, for example SQL Server instead of SQL Server Express. |
Database settings cannot be changed | A migration is in progress: the page shows Migrating data to the new database.... Wait until it completes, or click Cancel migration. |