Configure ServiceNow for UserLock Single Sign-On (SSO)
Enable ServiceNow Single Sign-On (SSO) with UserLock to centralize authentication, enforce corporate access policies, and simplify user access to the ServiceNow platform.
This guide explains how to integrate ServiceNow with UserLock Single Sign-On (SSO) using the SAML 2.0 protocol.
Once configured, ServiceNow logins are authenticated by UserLock against Active Directory. This provides a seamless login experience and allows administrators to apply UserLock access policies (MFA, time, machine, or location restrictions) on SSO sessions.
🚩️ Before starting:
You need a ServiceNow administrator account.
UserLock SSO must already be installed and configured.
In the UserLock console, go to ⚙️ Server settings ▸ Single Sign-On.
In the list of applications, select ServiceNow.
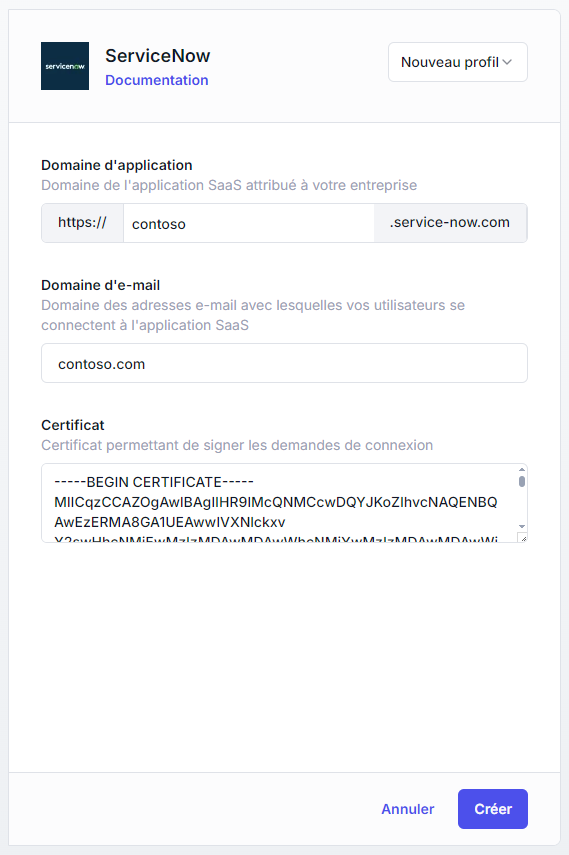
Fill in the fields with the following values:
Settings
Values
Application Domain
https://<yourInstance>.service-now.com
(the domain of your ServiceNow instance)Email domain
Domain used by users to authenticate (e.g. contoso.com)
Save the profile.
Ensure the Multi-Provider SSO plugin is installed:
In the ServiceNow search box, type Multi-Provider SSO.
If it’s not listed, go to System Definition ▸Plugins.
Search for Integration - Multiple Provider Single Sign-On Installer and install or activate it.
Log in to ServiceNow with an administrator account.
Navigate to Multi-Provider SSO ▸Identity Providers, then click New.
When prompted for the SSO type, select SAML.
In the Import Identity Provider Metadata dialog box, choose URL and enter:
https://<SSO_domain>/metadata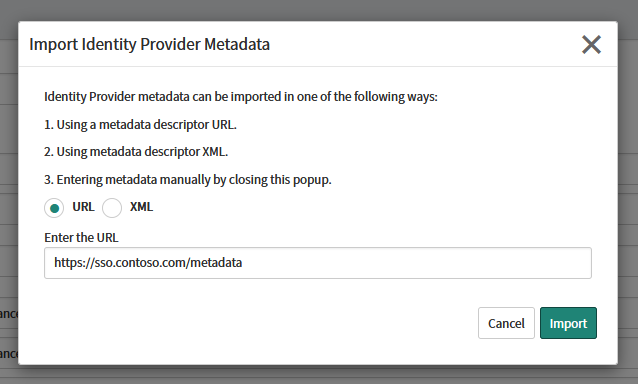
Click Import.
If an error occurs during import:
In the UserLock console, go to ⚙️ Server settings ▸ Single Sign-On.
Click on Download ▸ Metadata file
Open the downloaded file with a text editor (e.g. Notepad) and copy its contents.
Return to the ServiceNow console, select XML in the import dialog, and paste the content.
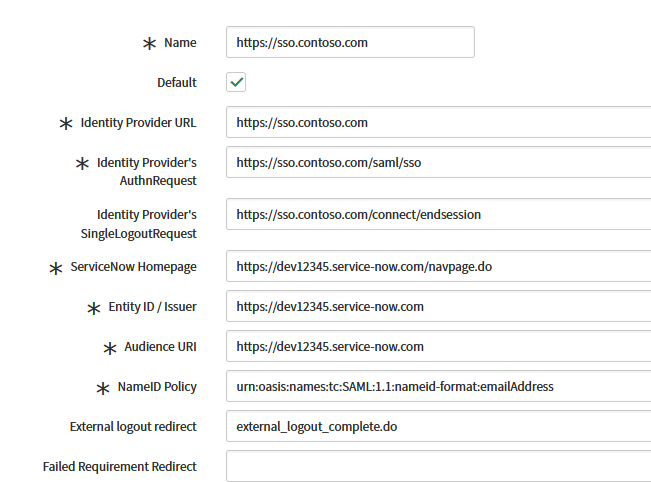
Once imported, verify that all fields are populated correctly.
Click Test Connection.
If the test is successful, click Activate.
If activation fails:
Clear the SingleLogoutRequest field in the Identity Provider settings.
Run the Test Connection and Activate process again.
Once successful, you can re-enter the SingleLogoutRequest URL:
https://<SSO_domain>/connect/endsession
Note
The SingleLogoutRequest field is optional. Keeping it blank during setup helps display more detailed error messages.
In the Identity Provider record, under Related Links, click Set as Auto Redirect IDP to redirect to UserLock SSO the users accessing your instance homepage.
Activate the SSO
Navigate to Multi-Provider SSO ▸Administration ▸Properties.
Click Enable multi provider SSO.
For common issues, see Troubleshooting SSO.
If the problem persists, please contact IS Decisions Support.
To disable SSO temporarily:
Open the Identity Provider configuration in ServiceNow.
Click Deactivate.
To bypass SSO and log in with standard credentials:
Go to
https://<yourInstance>.service-now.com/side_door.doYou’ll be redirected to the default ServiceNow login page where you can sign in using ServiceNow credentials.
The user account may not exist in ServiceNow.
Alternatively, the SAML certificate may be outdated.
This can occur when testing with a non-existent user.
To update a configuration after a successful test:
Deactivate the identity provider.
Update the configuration.
Run Test Connection.
Click Activate again.
You can extend the security of SSO sessions by applying UserLock access policies in addition to authentication.
Apply MFA on SaaS connections to require stronger authentication.
Hour restrictions: define when users are allowed to connect.
Geolocation rules: enforce access policies based on user location.
Session limits: allow or deny SaaS logins entirely for specific users.