Installing and Configuring UserLock Anywhere on IIS
UserLock Anywhere extends UserLock protection to remote workers without requiring a VPN connection. It allows the Desktop Agent to contact the UserLock server over the Internet at logon, enforcing MFA and contextual access restrictions.
When employees connect outside the corporate network, the UserLock Desktop Agent cannot always reach the UserLock service via VPN.
UserLock Anywhere solves this problem by allowing the agent to contact the UserLock server over the Internet at logon.
Unauthorized connections can be refused at logon.
With an advanced setting, administrators can also remotely disconnect users based on logon hours or quotas.
Before installing UserLock Anywhere, ensure the following:
A server running IIS with a public IP address registered in DNS.
Server Manager roles installed:
Web Server (IIS) → Security → Windows Authentication
Web Server (IIS) → Application Development → .ASP.NET 4.5
The IIS server must be joined to the domain.
(Delegated mode only) Additional delegation configuration in Active Directory.
For best performance, use a dedicated IIS server with a valid SSL certificate.
The UserLock Anywhere feature is now included in the default UserLock installation.
If UserLock is not installed on the server:
Run the UserLock installer and select Custom setup.
From Modules, select UserLock Anywhere.
If UserLock is already installed:
Open Control Panel → Programs → UserLock → Change.
Add the UserLock Anywhere feature.
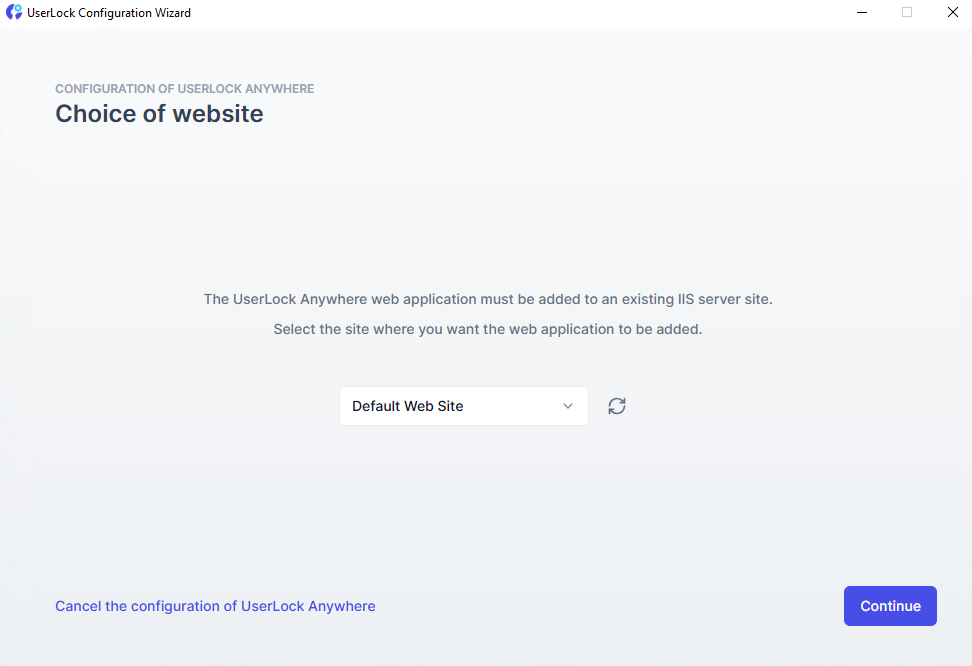
You can add the application using the Configuration Wizard:
Launch the configuration wizard.
Select Configure next to UserLock Anywhere.
The wizard checks Windows components and prompts for missing ones.
Choose the target website.
Note
To speed up fallback to UserLock Anywhere, deploy the UserLock server FQDN via Group Policy. This lets the agent quickly discard unavailable connections and switch to the Internet link.
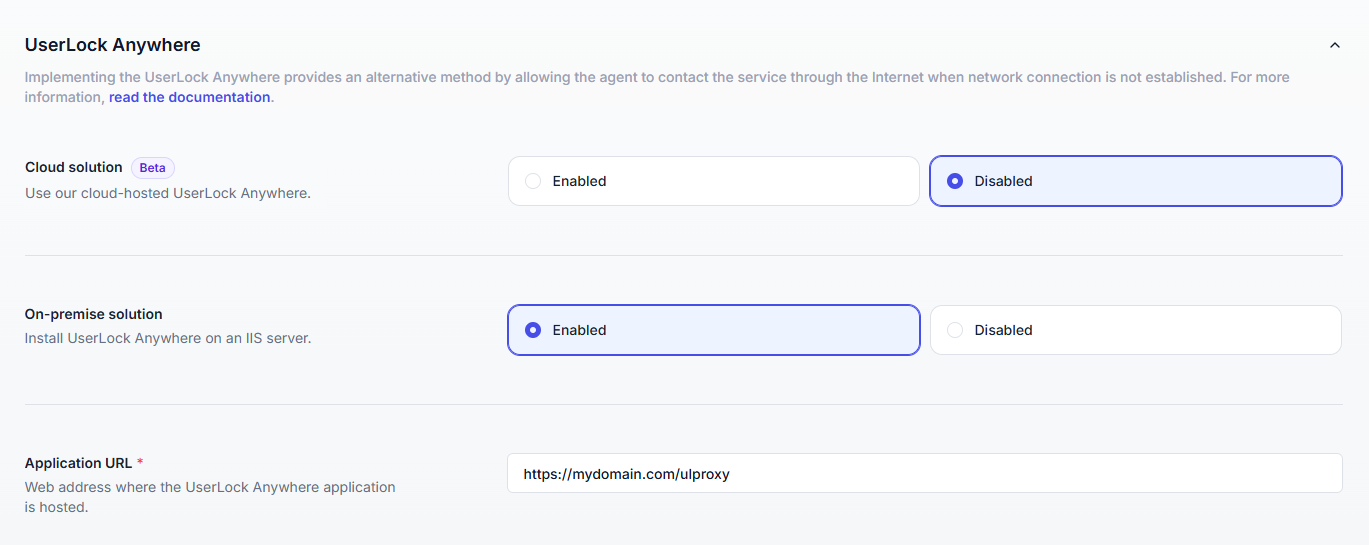
In the UserLock console:
Go to ⚙️ Server Properties → General → UserLock Anywhere
Enable the On-premise solution.
Update Application URL with the external IIS address.
For UserLock Anywhere to function, each target computer must:
Have the UserLock Desktop Agent installed.
Contain the UserLock Anywhere URL registered in the system.
👉️ Once UserLock Anywhere is configured, UserLock automatically deploys this URL to all managed computers in the site.
If a computer is not connected to the network during deployment, the URL must be added manually or via Group Policy.
Open the registry on the target machine.
Navigate to:
HKEY_LOCAL_MACHINE\SOFTWARE\Microsoft\Windows NT\CurrentVersion\WinlogonCreate a string value (REG_SZ) named
UserLockInternetUrl.Enter the UserLock Anywhere URL as its value.
For large environments or offline machines, you can distribute this registry key through Group Policy. See agent deployment guide for detailed steps.
Open a browser on a client machine and enter the public URL configured in Step 3.
If reachable, a confirmation page appears with the following information:
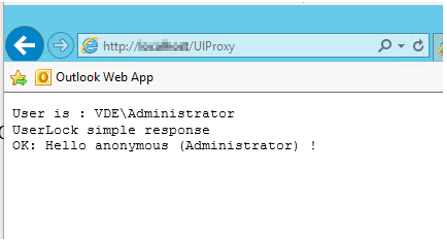
If not, verify IIS and DNS settings.
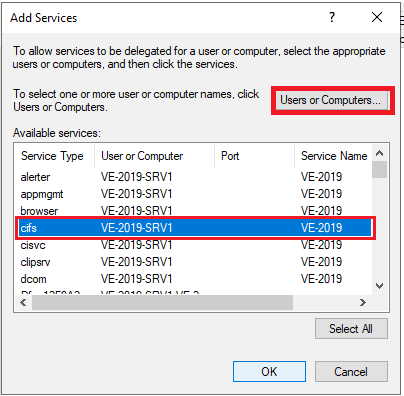
If IIS is not on the same machine as UserLock:
Install only UserLock Anywhere on the delegated IIS server.
In Active Directory Users and Computers → Machine properties → Delegation tab:
Select Trust this computer for delegation to specified services only.
Choose Use any authentication protocol.
Add the UserLock server → Service type cifs.
Since v11.0.1, UserLock Anywhere can enforce logoff remotely.
In the console, go to ⚙️ Server Properties → Advanced Settings.
In Agents section, configure Sessions without network logoff agent internet:
Value = interval in minutes between agent requests.
Default:
-1(disabled).Recommended: ≥ 10 minutes.
This allows UserLock to apply logon hours and quotas, even if the device is outside the corporate network.
This setting can also be deployed through Group Policy.
Symptom: Login delays before or after MFA when using UserLock Anywhere.
Cause: DNS caching issues with the ISP DNS.
Solution: Change DNS servers on the home router to a public DNS (e.g. Google DNS: 8.8.8.8 and 8.8.4.4).