Configure the client certificate authentication in UserLock Anywhere
Learn how to configure client certificate authentication in UserLock Anywhere to replace NTLM authentication.
When remote agents connect to UserLock Anywhere, authentication normally uses NTLM because domain controllers are not reachable outside the network, making Kerberos unavailable.
Since NTLM is being deprecated for security reasons, UserLock 13.0 introduces client certificate authentication, allowing agents to authenticate securely using computer certificates issued by your Active Directory Certification Authority (CA) and deployed via Group Policies.
This guide explains how to enforce and configure this authentication method in IIS for UserLock Anywhere.
Before starting, ensure the following conditions are met:
✅️ UserLock Anywhere is already installed and operational.
✅️ UserLock Agents are updated to version 13.0 or later.
✅️ All laptops have a computer certificate in the Local Computer Certificate Store.
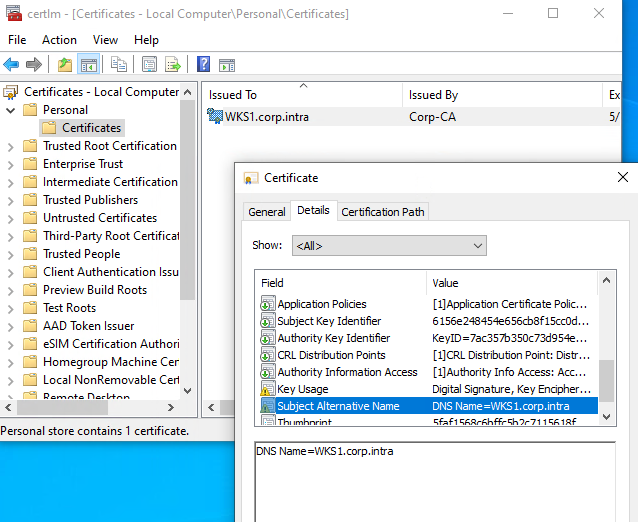
Computer certificate in Windows local certificate store ✅️ If users connect through UserLock VPN Connect, each user must also have a user client certificate in their Personal Certificate Store.
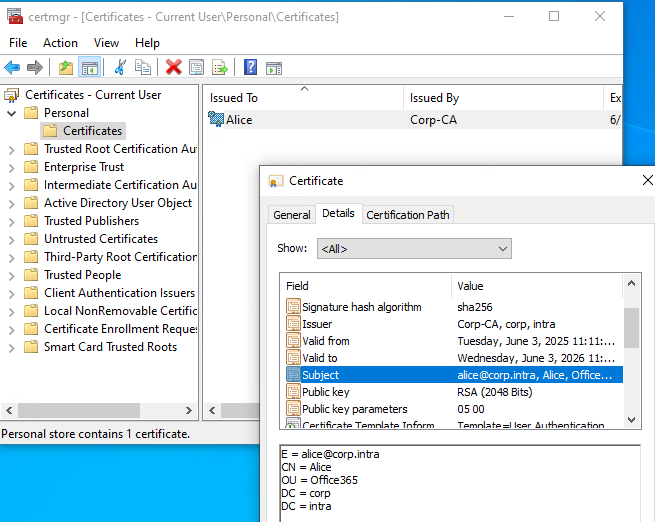
User certificate in Windows user certificate store ✅️ You are familiar with AD certificate deployment and Group Policy. For details, see Microsoft documentation on installing an AD Certification Authority and deploying certificates.
On the IIS server hosting UserLock Anywhere, open the SSL Settings of the ulproxy application.
Enable Require SSL.
Set Client certificates to Accept.
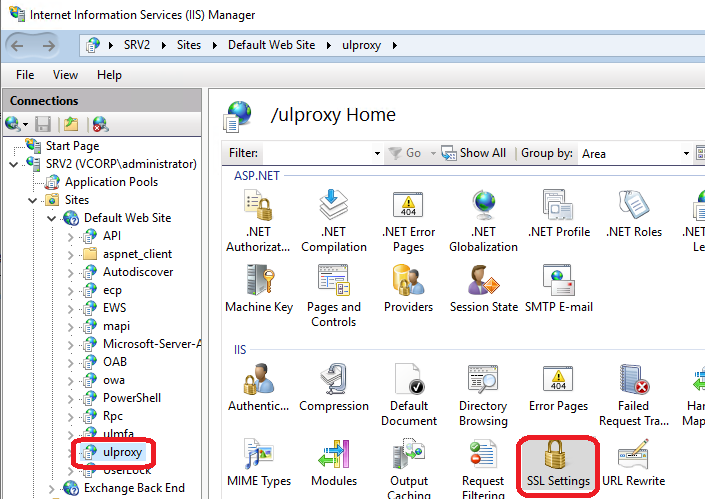
SSL settings selection in the UserLock Anywhere IIS application (ulproxy) 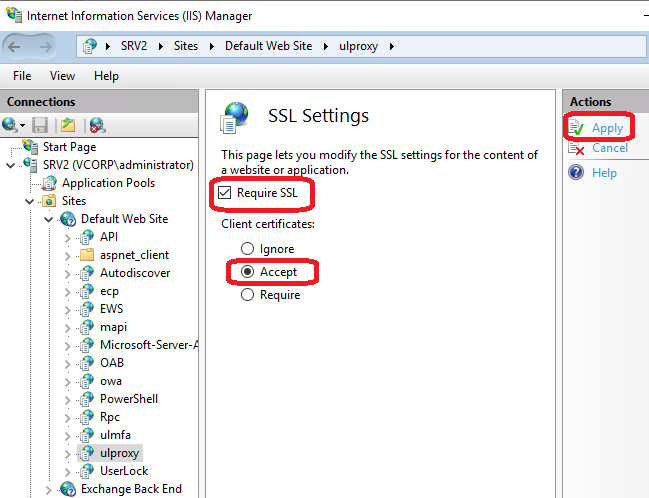
Accept client certificates in the UserLock Anywhere IIS application Wait for several remote logons (outside the corporate network) and VPN connections to occur, so that activity is recorded in UserLock Anywhere.
Access the certificate statistics page to verify agent behavior:
https://hostname/ulproxy/certificate-statsReplace
hostnamewith your server’s hostname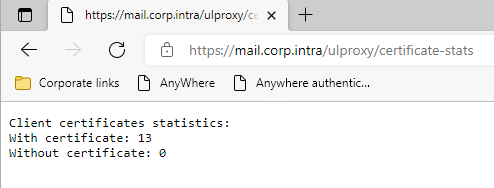
Client certificates statistics in UserLock Anywhere Wait until Without certificate = 0 for a sufficient time.
You can reset statistics by recycling the UserLockProxyAppPool application pool or adjust its recycling options to collect data over a longer period.Once all agents are sending their certificates, switch Client certificates in IIS to Require.
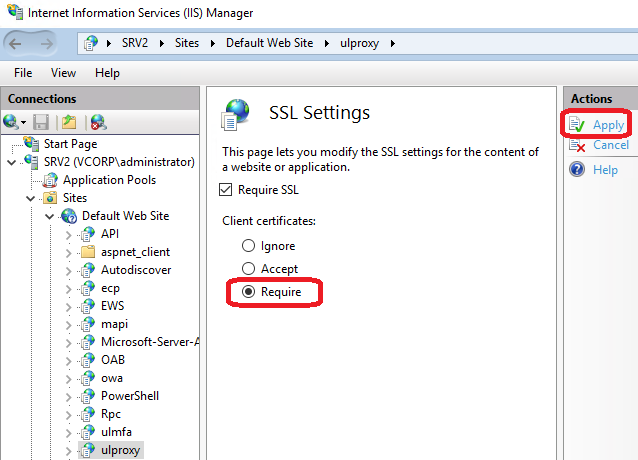
Enforce client certificates in the UserLock Anywhere IIS application
You can now be confident that all agents send their client certificate to UserLock Anywhere.
Note
💡 Optional: You may also restrict access to trusted computers only (see the Optional configuration section below).
Install the Active Directory Client Certificate Authentication feature in IIS by running the following Powershell command:
powershellInstall-WindowsFeature Web-Client-AuthIn IIS Manager, at the server level, open the Authentication section and enable:
Active Directory Client Certificate Authentication
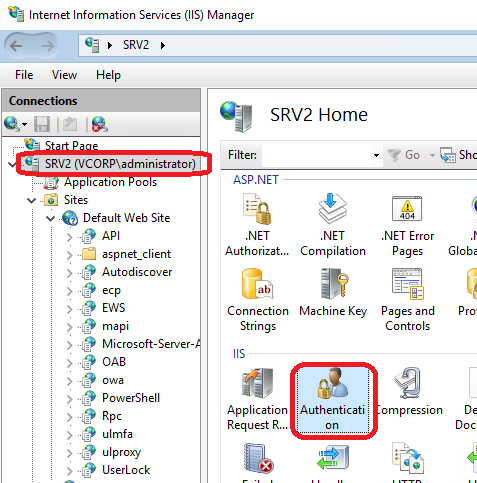
Select the Authentication section at the server level in the IIS administration console 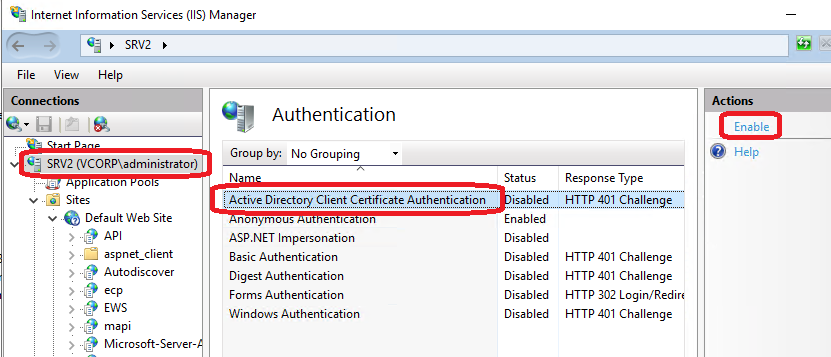
Enable the Active Directory Client Certificate Authentication at the server level in IIS
In the ulproxy application:
Open the Configuration Editor.
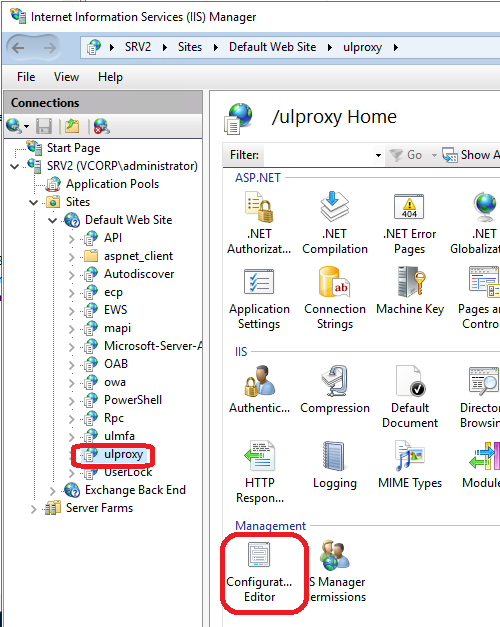
Select the Configurator Editor for the UserLock Anywhere IIS application Set:
system.webServer > security > authentication > clientCertificateMappingAuthentication = true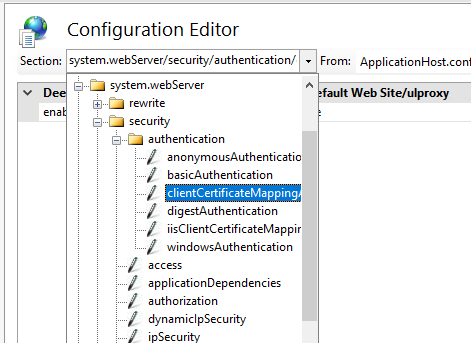
Select the Client Certificate Mapping authentication for the UserLock Anywhere IIS application 
Enable the Client Certificate Mapping authentication for the UserLock Anywhere IIS application
Wait for additional external logon activity and that users use UserLock VPN Connect.
Check the authentication statistics:
https://hostname/ulproxy/auth-stats
Authentication package statistics in UserLock Anywhere Once the only authentication package shown is SSL/PCT, NTLM is no longer in use.
You may then:Disable Windows Authentication in IIS for the ulproxy application, or
Disable NTLM globally on the server (see Microsoft documentation).
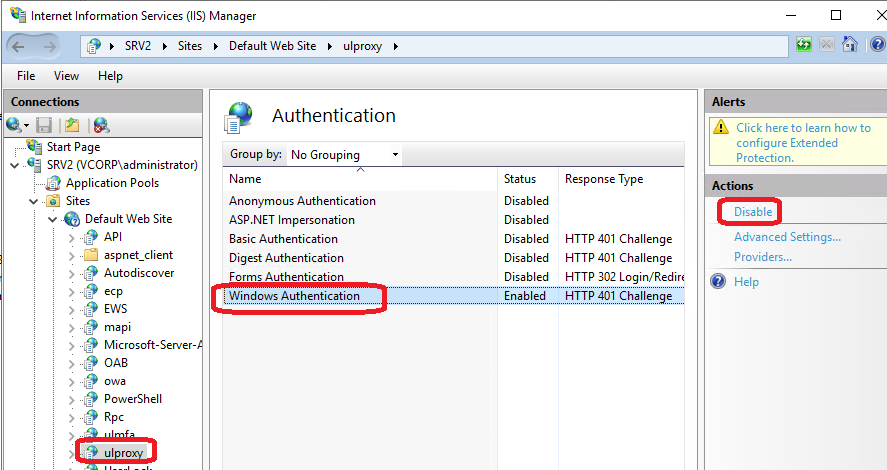
Disable the Windows authentication for the UserLock Anywhere IIS application
In some cases, the Active Directory Client Certificate Authentication feature doesn’t work immediately because the HTTP SSL binding lacks the required DS Mapper Usage option.
To verify this, open an elevated command prompt and run:
netsh http show sslcertYou should see a section similar to the following for your website:
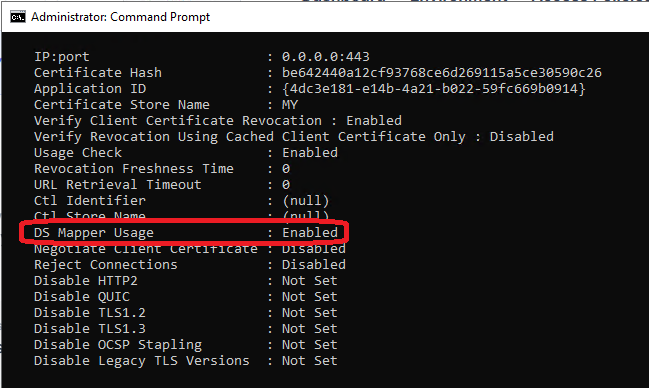
Check if the DS Mapper Usage binding option is enabled for the Userlock Anywhere web site If DS Mapper Usage is set to Disabled, you need to enable it manually.
Run the following command, replacing values with those from your configuration:
netsh http update sslcert ipport=0.0.0.0:443 certhash=be642440a12cf93768ce6d269115a5ce30590c26 appid={4dc3e181-e14b-4a21-b022-59fc669b0914} certstorename=My dsmapperusage=enable⚠️ Important:
Use your own values for
ipport,certhash,appid, andcertstorename.In some environments, additional parameters may be required to preserve other binding settings.
Run the following command to view all available options before executing the update:netsh http update sslcert helpAfter running the command, execute again:
netsh http show sslcertto confirm all other parameters remain unchanged.
In some cases, you might notice that NTLM continues to appear in authentication statistics, even though client certificate authentication is already functional.
This occurs because the UserLock Agent still includes the NTLM authentication header in its requests, even when not required.
To confirm this behavior:
Open the Local Security Policy on the IIS server.
Enable Audit logon events under Security Settings → Local Policies → Audit Policy.
Reproduce a connection from a remote laptop.
In the Windows Security Event Log, search for Event ID 4624 entries related to the computer account accessing UserLock Anywhere.
You should observe two logon events for each connection attempt:
Authentication package | Logon process | Description |
|---|---|---|
NTLM | - | Standard authentication header still sent |
Kerberos | Schannel | Client certificate authentication in use |
If both events appear, it confirms that client certificate authentication is correctly working.
NTLM can safely be disabled either per site (in IIS) or globally on the system (see Microsoft documentation).
After enforcing client certificates, you can further restrict UserLock Anywhere access to certificates issued only by your Active Directory CA (zero-trust approach).
Add your CA certificate to the Client Authentication Issuers store on the IIS server running UserLock Anywhere.
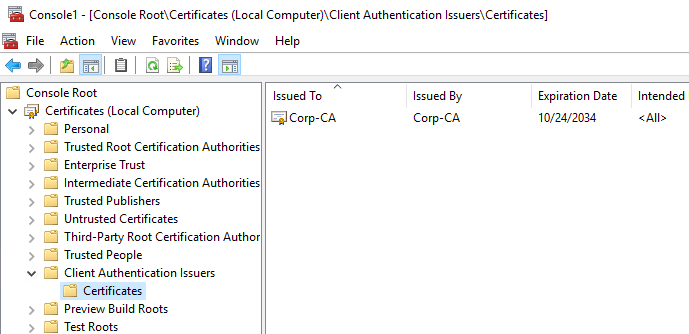
Authorized client authentication issuers in the Windows certificate store Update the IIS binding to reference this store:
netsh http update sslcert ipport=0.0.0.0:443 certhash=<your-cert-hash> appid={<your-app-id>} certstorename=My sslctlstorename=ClientAuthIssuer dsmapperusage=enableNote
Be careful when executing this command. Read the previous troubleshooting section for more information on how to execute it and be sure to do no mistake.
Enable trusted issuer filtering by setting the following registry key:
REG ADD "HKEY_LOCAL_MACHINE\SYSTEM\CurrentControlSet\Control\SecurityProviders\Schannel" /v SendTrustedIssuerList /t REG_DWORD /d 1Restart the IIS server.
After these steps, only computers from your Active Directory domain will be able to access UserLock Anywhere.
🔗️ See also: Microsoft Schannel SSP Technical Overview