Install a backup SSO server
Increase the availability of your UserLock Single Sign-On (SSO) service by installing a backup SSO server. In case of failure or maintenance of the main SSO service, the backup can take over after a simple DNS update.
UserLock Single Sign-On (SSO) provides secure and seamless authentication for web and cloud applications.
By deploying a backup SSO server, you ensure service continuity if the main SSO service becomes unavailable.
The backup server hosts a synchronized copy of your SSO configuration. If the main SSO service goes down, you can update the DNS record of your SSO URL to point to the backup server and restore access for users.
Maintain SSO availability in case of outage or maintenance.
Keep configuration and certificates automatically synchronized.
Easily restore access through DNS redirection.
Before installation, verify that:
The backup server meets the same SSO service requirements.
You install it on a separate machine from the main SSO server and, if possible, from the UserLock server itself.
Both SSO services must run the same version.
You have administrative rights on both machines.
Note
The backup SSO server does not communicate directly with the main one.
Synchronization is managed through the UserLock server that hosts the SSO configuration.
On a new, distinct server from your main SSO and UserLock servers:
Run the UserLock installer.
Choose Custom installation.
Select the UserLock SSO feature.
Unselect other features you do not need.
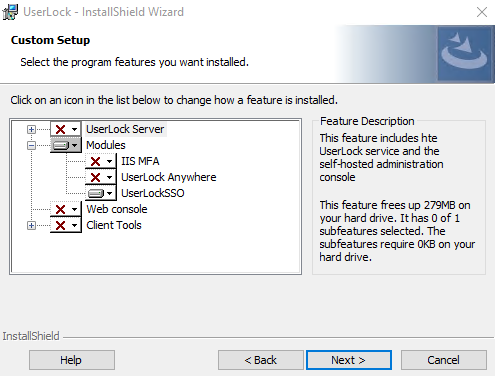
Complete the installation wizard.
Once installed, the configuration wizard will allow you to register this instance as a backup SSO service.
Open the UserLock configuration wizard.
In the Single Sign-On card, click Modify.
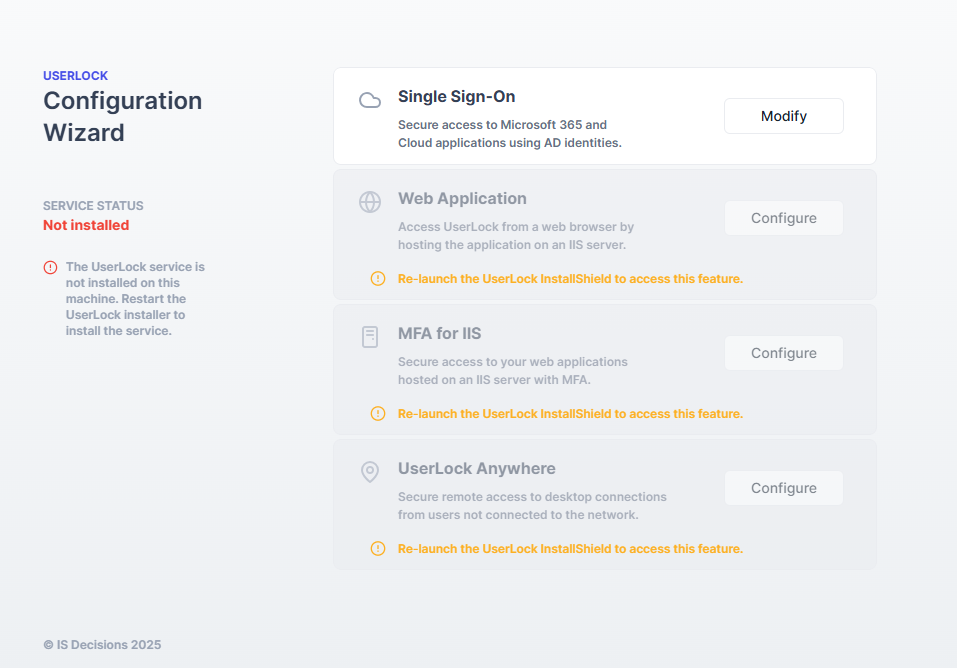
The main UserLock server is automatically detected if an SSO service is already configured in your environment.
Confirm that:
The left panel displays the main SSO server information.
The right panel is selected:
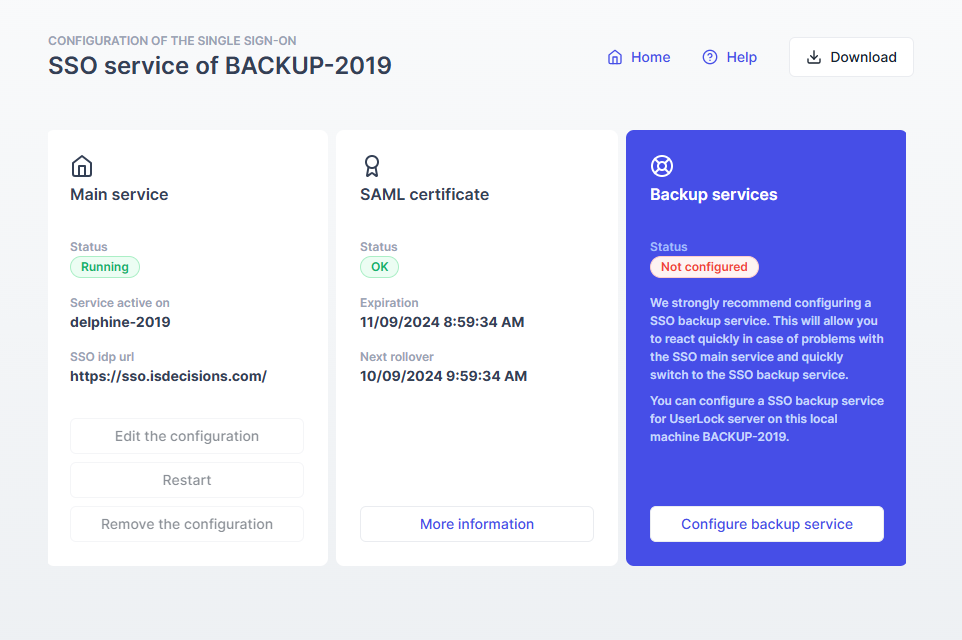
Click Configure backup service on the right.
Complete the wizard (the SSO URL is automatically added to your intranet zone).
🎉️ The backup SSO server is now ready.
It automatically synchronizes configuration data from the main SSO service.
You can now verify that the backup service is properly running and synchronized.
On the backup server, you can check its current status. From this interface, you can:
deactivate the backup service if necessary
view other configured backup servers
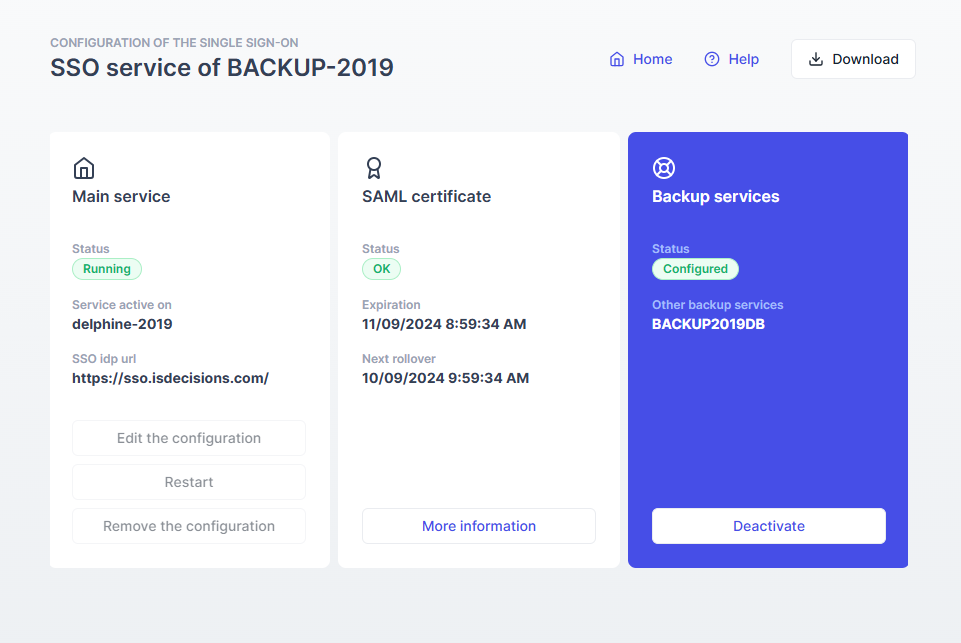
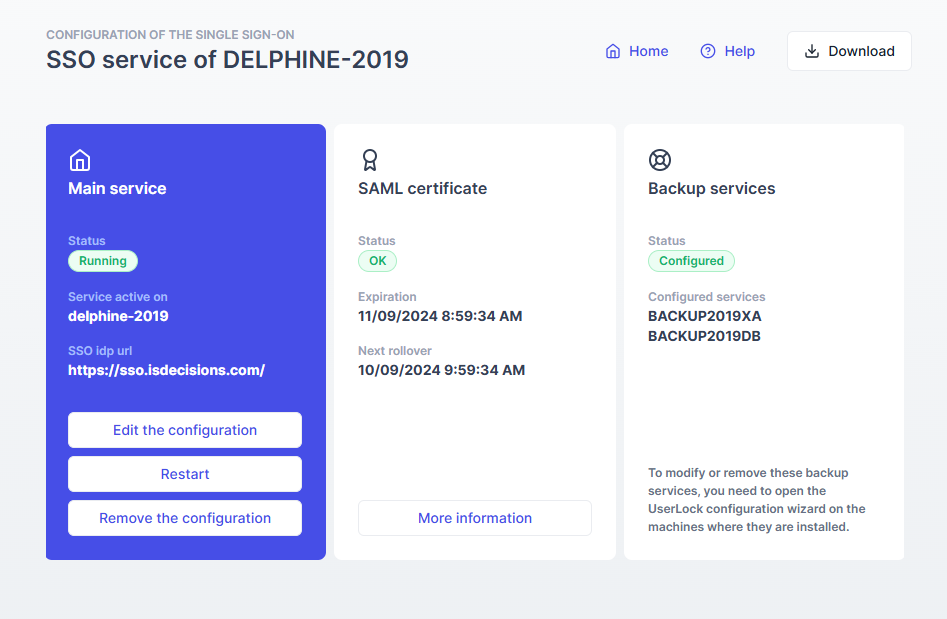
On the main SSO server, all backup servers are listed in the Backup services section. You can have multiple backup servers, all synchronized automatically.
Use a distinct host: Install the backup on a separate machine to prevent single points of failure.
Plan DNS management: Prepare how you will update your DNS.
Keep versions aligned: All SSO servers must run the same UserLock version.
Test regularly: Simulate a DNS switch to verify that the backup server works correctly.
Monitor synchronization: Check periodically that the configuration status is Configured on both ends.
If the main SSO service becomes unavailable, users may no longer be able to authenticate until the service is restored or redirected.
To maintain SSO access during downtime:
Update your DNS records to point the SSO URL to the backup SSO server.
This ensures that authentication requests are redirected to the backup instance.Once the primary server is back online, you can restore the DNS entry to its original address.
For detailed recovery procedures, see the 👉️ SSO troubleshooting and recovery guide.