Secure Microsoft access with UserLock Single Sign-On
Centralize Microsoft authentication through UserLock SSO to simplify user access while maintaining full administrative control over corporate accounts.
This guide explains how to prepare your environment and provides key recommendations to ensure a secure and reliable integration before completing the setup. It also details the steps required to configure SSO.
Note
If your Microsoft environment is a Government (GCC) tenant, please contact IS Decisions Support for specific guidance.
The configuration described in this documentation does not apply to government environments.
Keep the
onmicrosoft.comdomain as the default Entra ID domain. Microsoft prevents this domain from being federated, ensuring that accounts under it remain accessible even if federation issues occur.Maintain at least one administrator account within the
*.onmicrosoft.comdomain, protected by Entra ID’s native multi-factor authentication (MFA). This account allows you to recover access or reconfigure federation settings in case of authentication issues.
Changing the default domain in Entra ID has no effect on user credentials or access permissions.
However, changing the domain associated with a user will affect their email address, OneDrive URL, and login credentials.If you migrate a user to another domain to enable SSO, make sure to plan for these impacts before proceeding.
Note
For a Managed domain, authentication is handled directly by Entra ID.
For a Federated domain, authentication is delegated to a third party.
With UserLock SSO, authentication is performed by the organization’s local Active Directory.
In the UserLock console, open ⚙️ Server settings ▸ Single Sign-On.
From the list of applications, select Microsoft.
Enter the Entra ID domain you wish to federate.
For subdomains, refer to Federate a subdomain.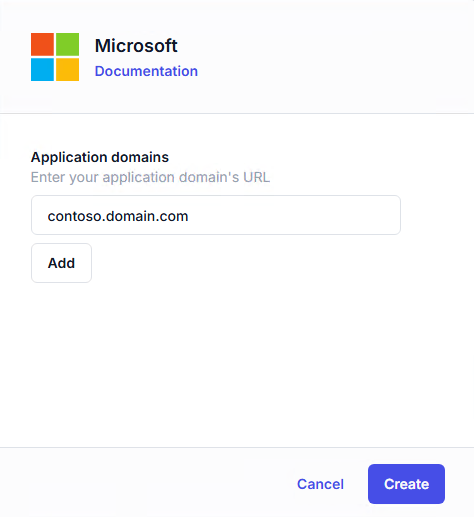
Click Create to confirm.
Before federating your Entra ID domain, ensure that all users are able to connect.
User synchronization between an on-premises Active Directory and Entra ID can be done in two ways:
Microsoft Entra Connect & Microsoft Entra Cloud Sync – Recommended.
Once configured, synchronization runs automatically and keeps both directories aligned.
UserLock SSO Assistant – A manual method that is easy to configure and suitable for initial testing or smaller environments, but less efficient for large-scale deployments.
In the UserLock Configuration Wizard, go to Single Sign-On ▸ Tools. This will open a new application: the UserLock SSO Assistant.
If prompted to install the PowerShell module, select Yes.
Choose Synchronize Active Directory and Azure Active Directory, then click Configure.
Sign in with your Entra ID Domain Administrator account.
Select the Active Directory OU and the Entra ID domain that contain your federated users.
Apply the Unsynchronized filter.
Click Synchronize for each user to complete the process.
Choose one of the following options:
Create a new Microsoft 365 user
Creates a new Entra ID account synchronized with the corresponding local AD user.Synchronize with an existing Microsoft 365 user
Links an existing Entra ID account to a selected Active Directory identity.
In the UserLock Configuration Wizard, go to Single Sign-On ▸ Tools. This opens the UserLock SSO Assistant application.
If prompted to install the PowerShell module, select Yes.
Choose Federate an Azure Active Directory domain with UserLock SSO, then click Configure.
Sign in using your Entra ID Domain Administrator account.
Select the domain you want to federate.
Click Federate to start the federation process.
Your domain is now successfully federated with UserLock SSO.
Note
If you encounter any issues with the UserLock SSO Assistant, you can perform the same configuration using PowerShell.
This method is recommended for advanced administrators who prefer scripting or need to integrate SSO setup into automated deployment or recovery workflows.
Open your preferred web browser.
Note
To test SSO with a different user than the one currently logged in to Windows, open a private or incognito browser window.
In Firefox, you may need to adjust authentication settings to allow SSO redirection.Go to
login.microsoftonline.com.Enter the email address of a federated user and click Next.
Note
Federation propagation may take several minutes. During this period, some Microsoft services might still request credentials.
If this occurs, wait a few minutes before trying again.If no password prompt appears, you have successfully connected using SSO.
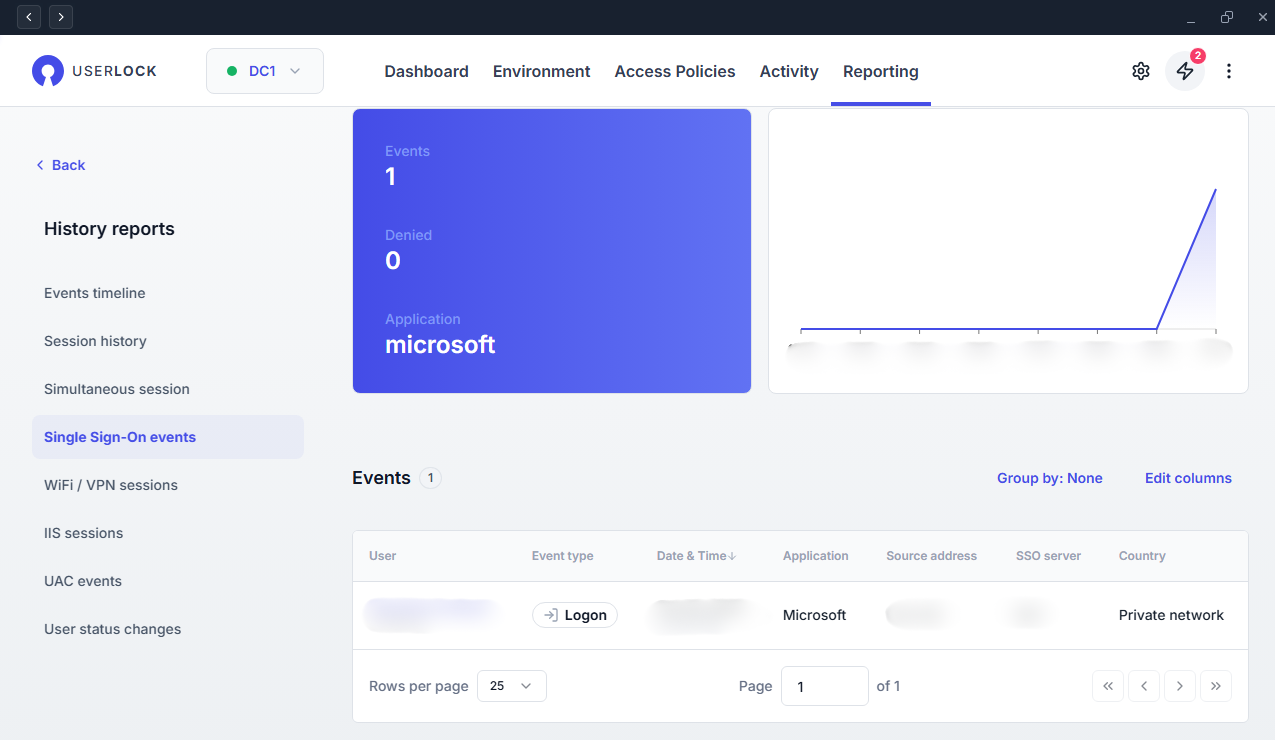
In the UserLock Console, go to Reporting ▸ History reports ▸ Single Sign-On events to verify the connection.
To update the SAML certificate, you need to re-federate your domain.
Go back to Step 3.
Change the domain status back to Managed.
Wait a few seconds to allow Microsoft services to propagate the changes.
Re-federate the domain to apply the new certificate.
If you attempt to federate a subdomain of a domain that is already configured in Microsoft, a warning message will appear.
Company XYZ uses the Microsoft 365 tenant mydomain.onmicrosoft.com, with mydomain.com as the primary email domain.
Two additional domains are configured:
sales.mydomain.com – for the Sales team
mydomain.fr – for the French team
When configuring SSO, only mydomain.com and mydomain.fr need to be federated.
The subdomain sales.mydomain.com will be automatically federated because it belongs to the same tenant.
Company XYZ uses two Microsoft 365 tenants: mydomain.onmicrosoft.com and myotherdomain.onmicrosoft.com.
Domains are organized as follows:
mydomain.com – primary email domain
sales.mydomain.com – Sales team (associated with myotherdomain.onmicrosoft.com)
myotherdomain.com – French team
When configuring SSO, make sure to add all three domains.
Since sales.mydomain.com belongs to a different tenant, it cannot be automatically federated with mydomain.com.
Add it manually and simply ignore the automatic federation warning.
You can further strengthen SSO session security by applying UserLock access policies alongside authentication controls.
Apply MFA to SaaS connections to enforce stronger authentication.
Set Hour restrictions to define when users are allowed to sign in.
Use Geolocation rules to restrict access based on user location.
Configure session limits to allow or deny SaaS logins entirely for specific users.