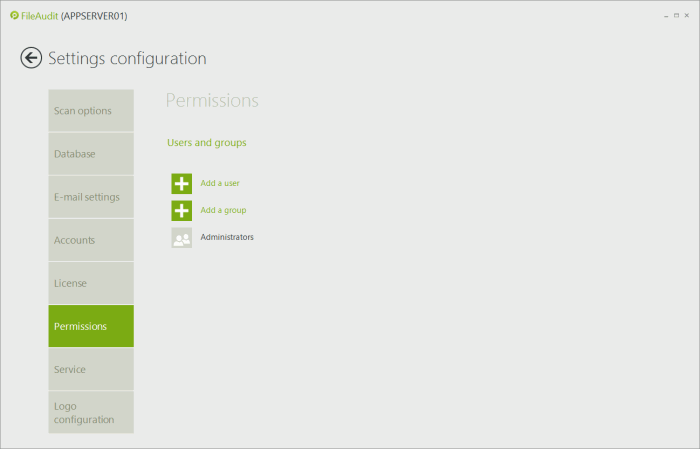
Permissions
This feature provides FileAudit with the rights granularity for Audit administrators. You can set specific accounts for people without administrative rights and define which FileAudit features you wish to make available to them.
Adding an account
-
Click ‘Add a user’ or ‘Add a group’ to grant access to FileAudit:
-
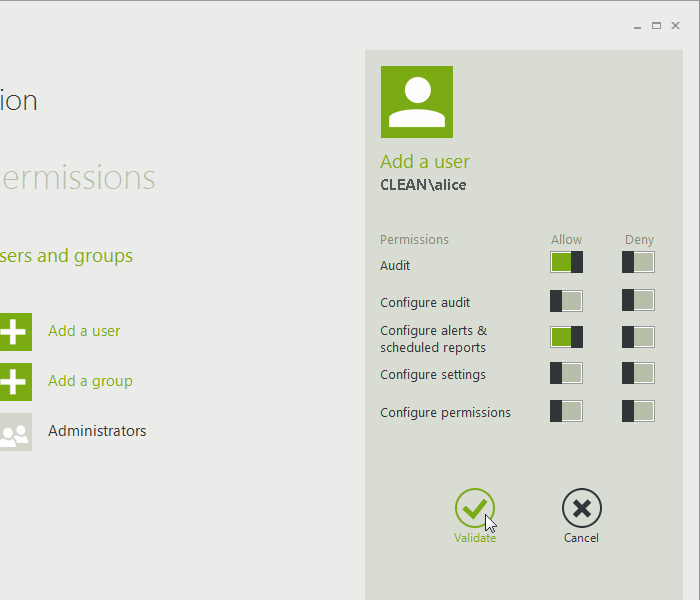
The Microsoft account selector will appear. Type the desired account name and click ‘Check Names’. Once the account name is detected and validated, click ‘OK:

-
A panel will appear on the right-hand side of the ‘Permissions’ view, allowing you to define which FileAudit features you want to allow/deny for this specific user or group:
-
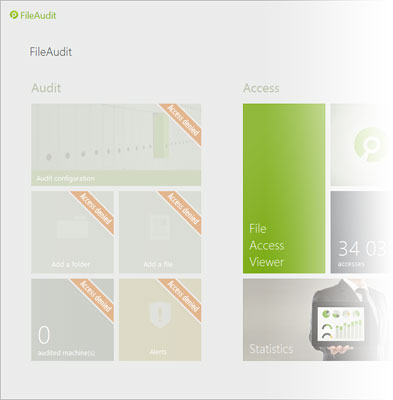
Any denied features will now have their corresponding tiles disabled in the FileAudit hub.
Permissions definitions
- Audit: Allow/Deny the display of the File Access Viewer.
- Configure Audit: Allow/Deny the creation/modification/deletion of an audited path.
- Configure Alerts & scheduled reports: Allow/Deny the creation/modification/deletion of alerts and reports features.
- Configure settings: Allow/Deny access to the Settings configuration of FileAudit.
- Configure permissions: Allow/Deny access to the specific Permissions section.
Rights behavior
The FileAudit rights management is based on the same rules as Microsoft Windows:
- ‘Deny’ will always overwrite ‘Allow’. If a user depends on several accounts allowing a feature but one is denying it, he will be denied.
- If ‘Allow’ and ‘Deny’ are not defined, access will be denied except if the account depends on a group where the right is defined to allow it.
Take care to not deny access by accidentally deleting the default administrators account rule.