Migrate to another database
Move all your FileAudit data to a new database and keep auditing without losing your records.
Migrating copies all data from your current production database to another database. Once the copy completes, the new database becomes the production database and FileAudit continues auditing against it.
Use this guide when you change databases and want to keep your existing records. To switch the production database without copying any data, use Set production database instead.
Before you start, make sure you have:
The connection details for the destination database (server, instance, and credentials, depending on the provider).
Network access to the destination database from the FileAudit service.
On the main screen, click the Database & audit maintenance tile. On the Database manager tab, click Migrate.
Click the three dots (
...) at the end of the Connection string field to open the Database connection window.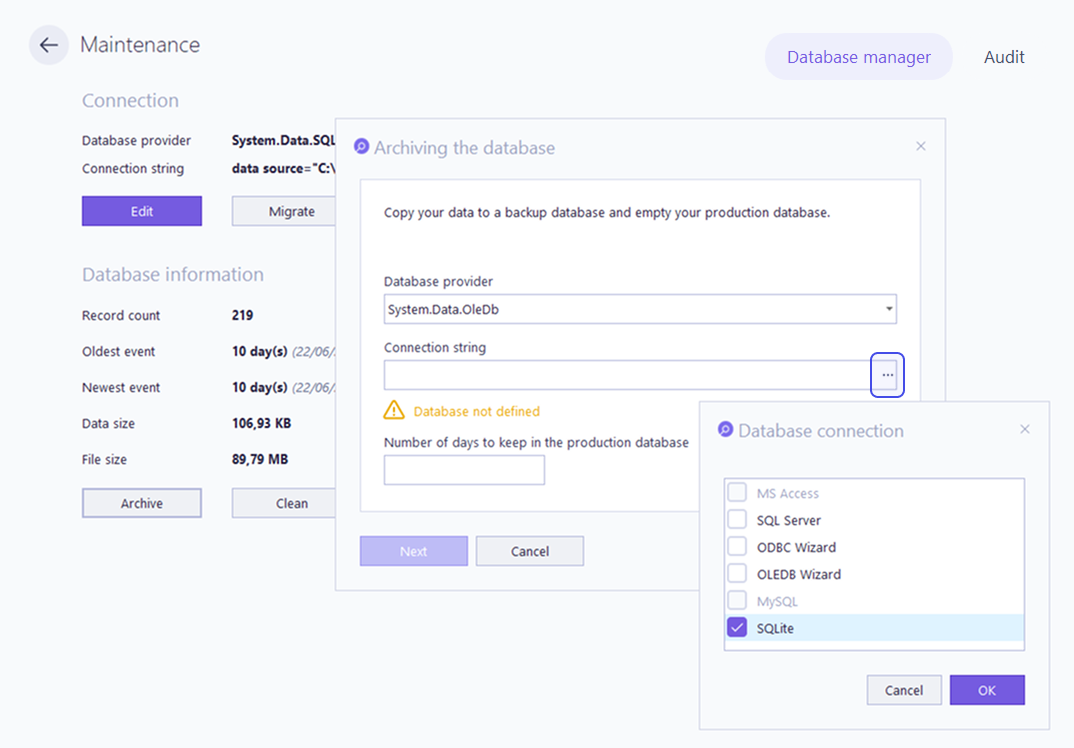
Select your destination database connector (such as SQL Server, ODBC Wizard, OLEDB Wizard, or SQLite) and click OK. A window opens for you to enter the connection details for that connector.
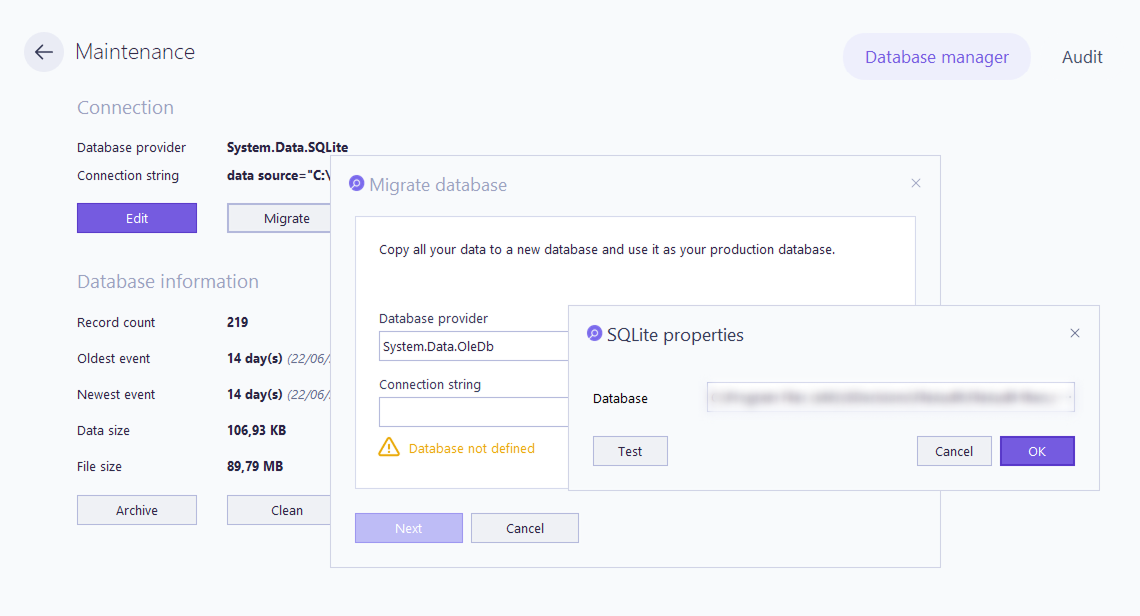
Fill in the connection details and confirm.
Back in the Migrate database dialog, the Connection string field updates. Click Next.
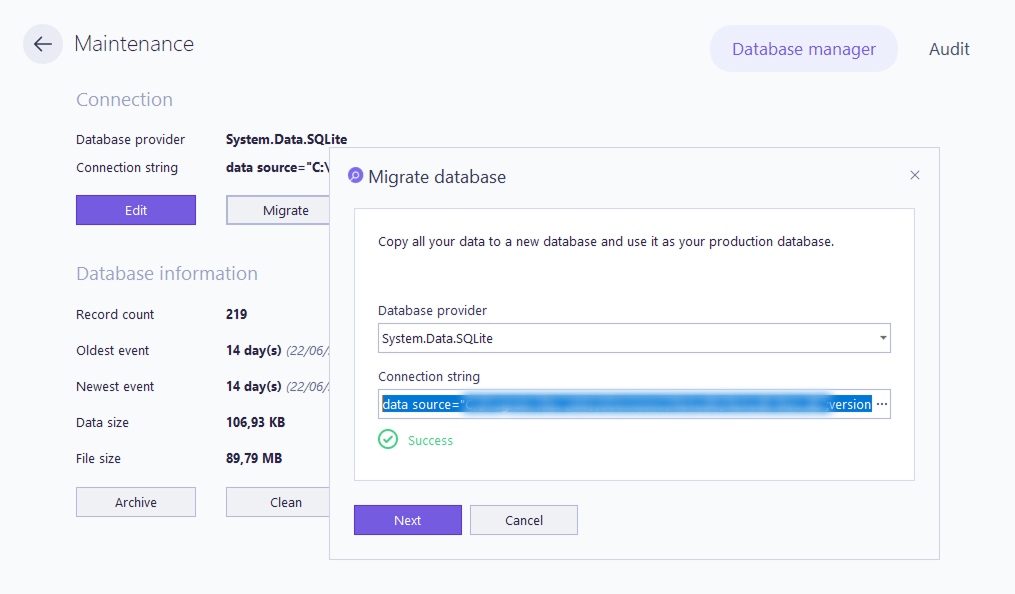
Click Migrate.
Note
⚠️ Important
Migration can take a while when the production database holds a large volume of events. Let it finish: do not close FileAudit or interrupt the service while the migration is running.
The new database should contain all the events from your previous database, not just events recorded after the switch. To confirm:
Check that the production database has been updated to the migrated one.
Open a report covering a date range from before the migration.
Check that the events from that period appear. See Displaying the events Getting started.
If your older events show up, the migration copied your data successfully.