File and folder NTFS permissions and properties reporting
Report on NTFS permissions for all your files and folders. View file and folder properties such as size, attributes, creation date, last modified and last access date.
)
)
)
Audit basic and advanced NTFS permissions on Windows Servers
FileAudit allows you to have a centralized view of the NTFS permissions (basic and advanced) of your files and folders.
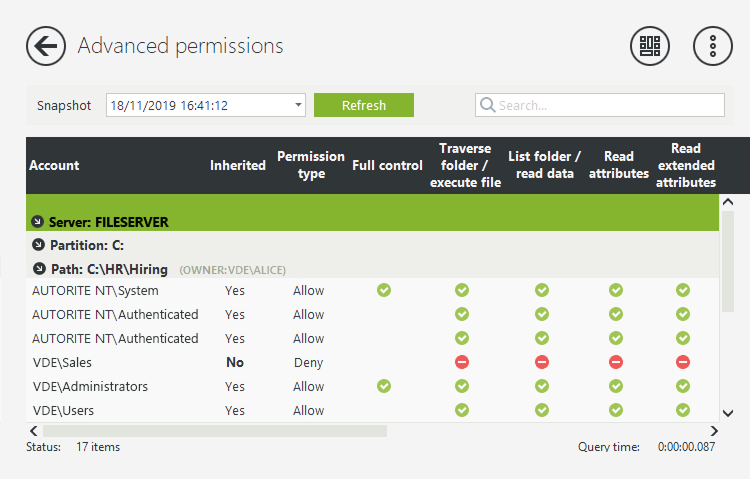
See all NTFS permissions and permission changes. Drill down into live and historic detail of who has access to what.
Prevent unauthorized access
Get a centralized list of file and folder permissions per account
Significantly reduce the time IT spends monitoring permissions to files and folders
Focus on what’s important thanks to filters and scheduled reports
Meet compliance regulations such as GDPR, HIPAA, SOX, FISMA
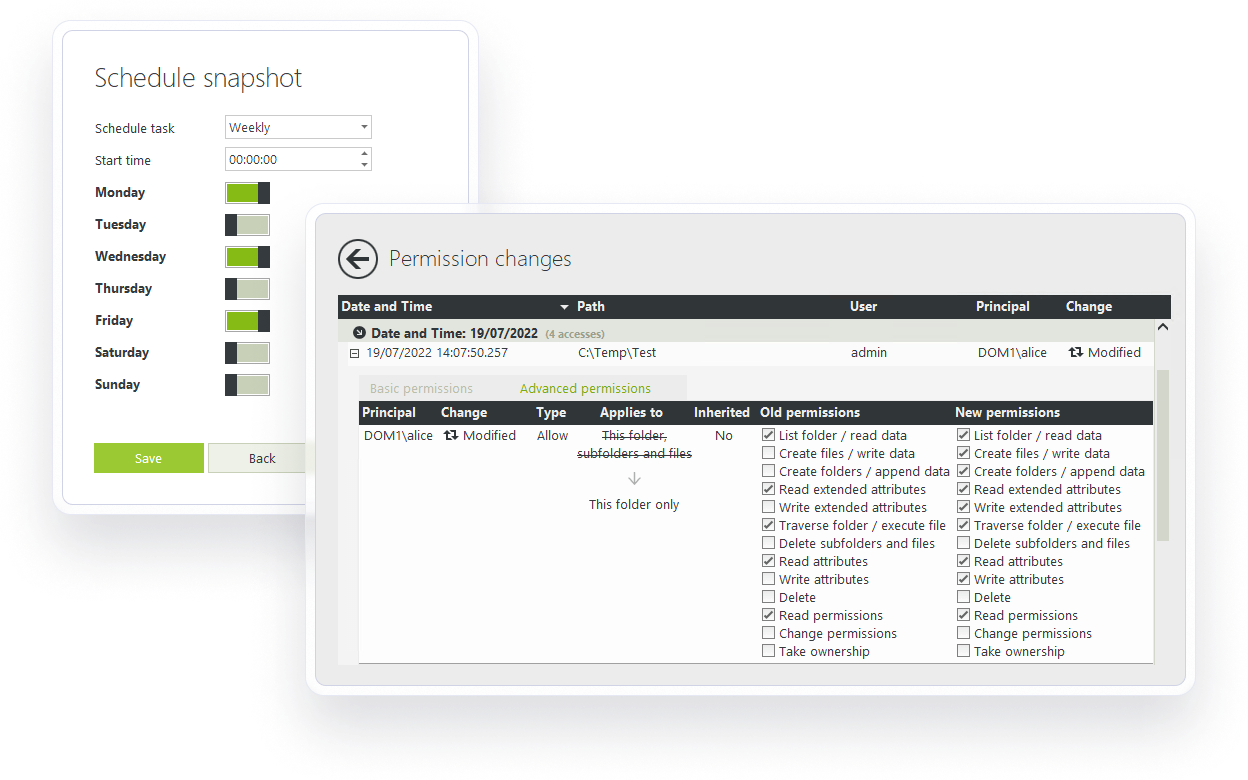
Track NTFS permission changes
Track and get alerts on permission changes.
Monitor and track permission changes to see who has access to what, when, and who made the changes.
Capture who has access to what at a given time with a snapshot of permissions to record access at a specific time.
See the name of the user and the name of the file/folder that will be impacted when you set up an alert.
Simplify reporting
With FileAudit, access predefined reports, schedule reports, and select favorite reports to display on the dashboard.
)

View file and folder properties
See all file and folder properties in one centralized view. FileAudit shows properties such as size, attributes, creation date, last modified date and last access date.
Key benefits
Track & manage disk usage
Get actionable information on your files and folders (recently modified files, last changed, last accessed...)
Get a clear view of what’s taking up space
Significantly reduce the workload related to cleaning up files (to save up space or prepare for a cloud migration, for example)
Boost data security with FileAudit
)
)
)
)
File monitoring: A data breach detection & prevention tool
Your file system is either a target or an asset for malicious activity. That’s what makes security at file access, and a data breach detection and prevention tool, so important. Put file monitoring in place, and you’ll be in a better position to identify bad actors and stop a data breach.
Read)
)
)
)
The role of file auditing in compliance
Learn how file auditing can help you meet compliance objectives, secure your data on Windows and cloud servers, and avoid costly penalties.
Read