Enforce user logon restrictions with contextual access management
Use the contextual information around a user’s logon to authorize, deny, or limit how a user can access the network, alongside multi-factor authentication (MFA).
Ensure appropriate employee access
Avoid frustrating end users
Enhance security without creating work for IT
)
)
)
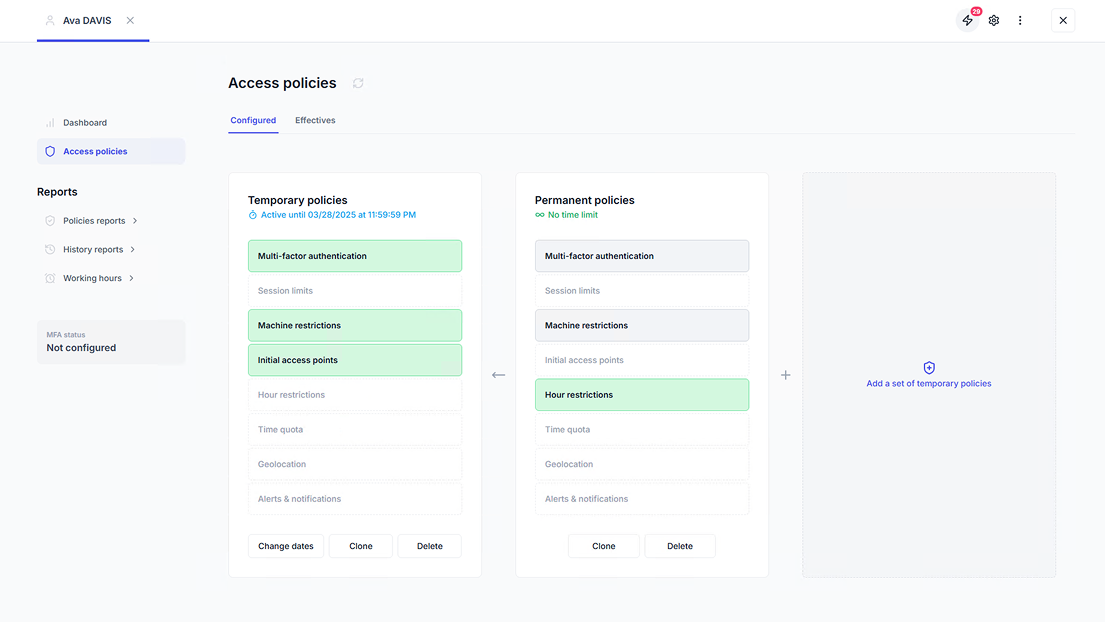
Restrict access based on contextual factors
Go beyond existing Active Directory capabilities to easily apply customized login restrictions by user, group, or organizational unit (OU). Automatically block any logon attempts that don’t satisfy these granular access control security policies.
)
)
)
)
Origin
Limit access by workstation, device, IP range, organizational unit (OU), department and country.
)
)
)
)
Time
Limit access to specific hours, set daily, weekly, or monthly time quotas, maximum session times, and idle session time.
)
)
)
)
Session type
Control which sessions to allow for users (workstation, terminal, Wi-Fi, VPN, IIS, and SaaS) to protect both interactive session and network access for remote and mobile users.
)
)
)
)
Simultaneous connections
Prevent concurrent logins for a single user and limit the number of initial access points to ensure all access is attributed to a single user.
Why implement contextual access management?
Enhance security
Adapt your security measures to the situation, and drastically reduce both the risk of a data breach and the burden on your team. Context-aware access controls are especially useful to secure remote employee access.
Prevent threats proactively
Identify suspicious access attempts before they escalate. UserLock’s contextual approach allows you to easily spot anomalies and take action to mitigate potential threats.
React in real time
Ensure access security remains intact thanks to UserLock’s real-time enforcement of context-based access restrictions.
Keep end users happy
Choose your own balance between security and usability, and create a seamless, efficient experience for end users.
Deliver the right access, at the right time, to the right person
Set effective restrictions granularly to protect against unauthorized access, even if credential compromise happens.
Set restrictions by user, group or OU
Restrict access by machine or workstation
Deny simultaneous connections
Limit access to specific timeframes
Secure VPN access to an authorized machine
Protect any remote access
Apply temporary controls
View all contextual logon restrictions for specific users, groups or OUs
Meet compliance with context-aware access controls
Demonstrate system access controls, user identity verification, shared login restrictions, and simultaneous login prevention to meet cybersecurity compliance standards and insurance requirements.
GDPR
Address GDPR compliance to keep personal data safe
HIPAA
Address HIPAA compliance to keep patient data safe
PCI DSS
Address PCI DSS compliance to keep sensitive cardholder data safe
Sarbanes Oxley’s
Comply with Sarbanes Oxley’s (SOX) security regulations
ISO 27001
Address network and information access for ISO 27001 compliance
NIST
Address NIST 800-53 and NIST 800-171 compliance to keep federal data safe
UserLock is simple to install, easy to configure and offers a level of protection that all small, medium and large business should be implementing as part of their security roadmap.
Ricky Magalhaes
WindowSecurity.com
UserLock offers Windows server administrators powerful access protection to prevent internal and external threats related to compromised credentials.
HelpNet Security
)
Organizations need to control who has access to their systems, networks, and company-sensitive information. UserLock provides businesses with facilities that strengthen network logon security.
Andrew Kellett
Principal Analyst, Infrastructure Solutions | Ovum
The control over a user’s ability to log on is granular, but the best feature for me is that it is non-invasive – no schema extensions information left behind to worry about.
Matt Hitchcock
Active Directory Technical Lead | Barclays Bank
)
Combine session management with context-based user access restrictions and MFA
For optimal security, use session management alongside UserLock's strong authentication and contextual access management capabilities.
)
)
)
)
Multi-factor authentication (MFA)
Add an extra layer of security beyond credentials to secure the initial point of access, the logon.
)
)
)
)
Single sign-on (SSO)
Combine SSO with MFA to quickly, securely offer access across a hybrid environment.
)
)
)
)
Session management
Monitor, alert and respond to all Active Directory user logon events.